
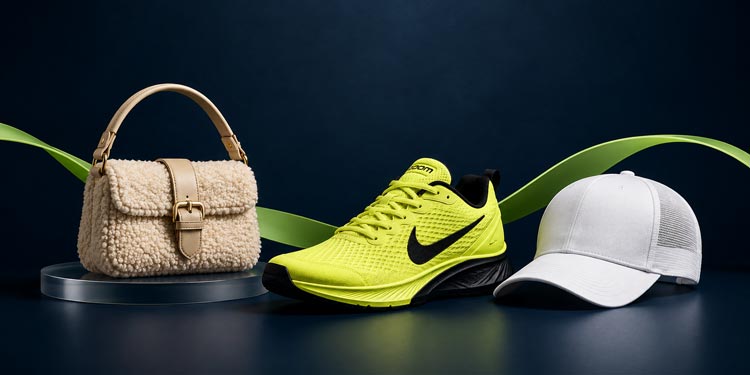
Product pages live and die by images. You can have the best pricing, the cleanest descriptions, and a great ad campaign, but if the photos look inconsistent, dull, or off, people hesitate. That’s why product photo retouching is not a nice-to-have step. It’s the final quality control layer that makes your product look trustworthy, accurate, and worth buying.
Table of Contents
Start With The Goal: Accuracy First, Beauty Second
Great product photo enhancing is not about turning every item into a glossy fantasy. It’s about making the product look like the product, just at its best. Customers should not feel surprised when the package arrives. The best edits remove distractions, fix camera limitations, and present a clean, consistent visual story.
Before you zoom into pixels, quickly confirm what done means for your brand. Are you aiming for a pure white background marketplace look, a lifestyle brand aesthetic, or a premium studio feel with soft shadows? When your goal is clear, every retouching decision becomes easier.
Check The Background: Clean, Consistent, And Marketplace-Ready
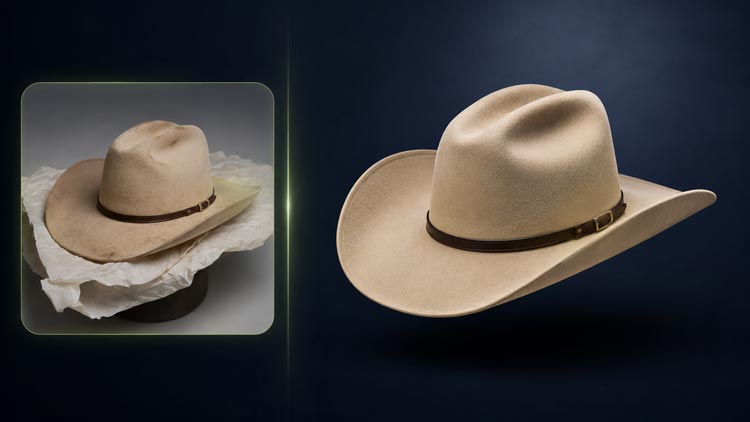
Background problems are one of the most common reasons a listing looks unprofessional, even if the product itself is shot well. In product photo retouching, background work often takes longer than people expect, especially for hair-like textures, transparent materials, or reflective products.
For white background requirements (like many marketplaces), make sure the background is truly white and consistent across the entire frame. Off-white corners, gray gradients, and dirty patches read as low quality. Also watch for harsh cut lines, leftover halos, and jagged edges around the product.
If you use colored or textured backgrounds for branding, still keep them consistent. A slightly different shade between images can make your grid look messy and can reduce perceived brand quality.
Inspect The Cutout Edges: No Halos, No Jagged Lines, No Missing Detail
Cutouts are where bad editing shows immediately. Zoom in and follow the product edge all the way around. In product photo editing, edge quality is the difference between premium and cheap.
Look for bright halos on dark products, dark outlines on light products, and uneven clipping that eats into the product shape. Pay extra attention to challenging areas like fur, lace, net fabric, jewelry prongs, bottle pumps, transparent plastic, and glossy packaging. Those are the spots where fast edits tend to break.
If your workflow includes background removal, confirm the product still looks natural against the new background. A clean cutout with no realistic shadow can make the item feel like it’s floating, which is rarely what you want for e-commerce.
Fix White Balance: Make The Product Color Trustworthy
Color accuracy is a conversion issue and a returns issue. If the product looks warmer in one image and cooler in another, shoppers start doubting what they’re seeing. Strong Product Photo Enhancing always includes white balance control.
Check the product against a known reference. Whites should look white, blacks should look black, and neutral grays should not drift blue or yellow. Then compare across your full set. A collection page should look cohesive, especially for variants in the same product line.
For products where color is the selling point (fashion, cosmetics, home decor), this step is critical. A small shift can change cream into yellow or charcoal into navy.
Balance Exposure And Contrast: Bright Enough Without Losing Texture
A common mistake is making images pop by over-brightening them. That can erase texture, flatten the product, and remove premium detail. The goal of Product Photo Enhancing is to enhance visibility while preserving realism.
Check highlights first. Are reflective areas blown out? Are metallic surfaces losing detail? Then check shadows. Are they crushed to pure black? If you can’t see stitching on dark fabric, embossing on packaging, or subtle texture on matte products, you probably need a more controlled adjustment.
Also compare your hero image to your secondary images. If the hero looks bright and clean but the angles look darker, your set will feel inconsistent.
Correct Color Casts And Mixed Lighting

Mixed lighting creates weird color behavior: part of the product looks warm, part looks cool, and the background might shift unevenly. This is where careful product photo retouching saves the day.
Look closely at white or reflective surfaces. If you see green, yellow, or magenta tints, correct them with selective adjustments. Cosmetics, glass bottles, stainless steel, and glossy plastics reveal these issues the most.
If you have a full product catalog, it’s worth standardizing lighting and retouching settings so every SKU looks like it belongs to the same brand universe.
Remove Dust, Scratches, And Manufacturing Debris
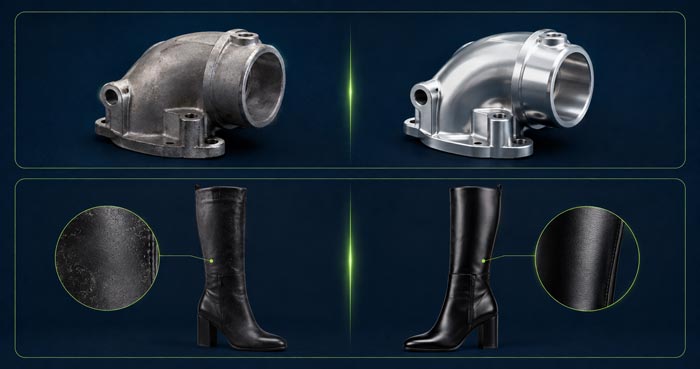
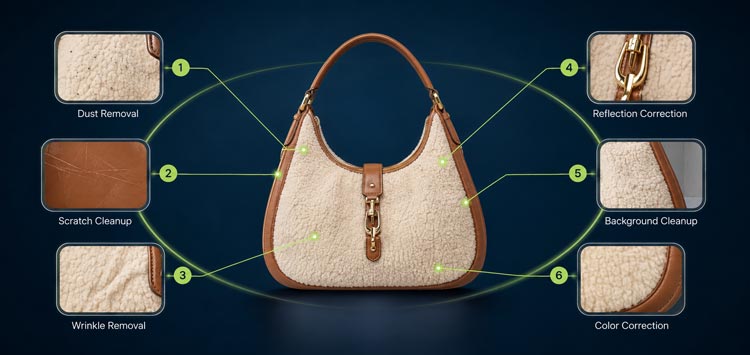
No product arrives from production perfectly clean, and no studio is truly dust-free. Tiny particles, hairline scratches, fingerprints, and lint show up brutally in high-resolution product photos. This is everyday work in product photo enhancing.
Clean the product surface while keeping it believable. For example, you can remove dust on a glass bottle, but don’t erase essential texture like leather grain or fabric weave. The product should look new and well-presented, not artificially smooth.
For items like jewelry and watches, dust removal and micro-scratch cleanup can dramatically increase the luxury feel. For apparel, lint and loose threads can be removed, but seams and natural folds should still look real.
Reduce Glare And Control Reflections On Glossy Products

Reflections are tricky because they can either enhance realism or completely ruin visibility. In product photo retouching, the objective is usually clarity: show the product, show the label, show the shape.
Check bottles, jars, phones, screens, and glossy boxes. Is there glare covering key branding text? Are reflections distracting, showing the studio environment, or creating harsh white streaks? Tone them down without making the product look matte if it’s supposed to be glossy.
For reflective metals, don’t blur it into gray. Premium metal should still have controlled highlights and depth. This is one of the fastest ways to tell whether retouching was done by a specialist.
Sharpening And Noise: Crisp Details Without Crunchiness
Images should look crisp, but not crispy. Over-sharpening creates halos and a gritty look, especially around text and edges. Under-sharpening makes your product feel low resolution, even if it’s not. Smart Product Photo Enhancing finds the middle.
Zoom in to 100%. Check labels, stitching, and fine textures. Then check the background for noise, especially if the image was shot at a higher ISO. If shadows look speckled, you may need noise reduction, but apply it carefully so you don’t smear detail.
If you are uploading to platforms that compress images, remember that heavy sharpening can look worse after compression.
Align And Straighten: Symmetry Sells
You’d be surprised how often products are slightly tilted. That tiny lean makes a listing look amateur. In Product Photo Enhancing, alignment is a quiet but powerful conversion upgrade.
Make sure vertical products are actually vertical. Keep horizon lines level in lifestyle images. For flat lays, ensure the product is squared and centered. If you sell sets or bundles, align the items consistently across the series so the catalog looks intentional.
Also verify cropping. Inconsistent spacing between the product and the frame edges can make your grid look chaotic.
Consistent Shadows: Ground The Product Naturally
Shadows are emotional. They communicate realism, weight, and quality. A product without a believable shadow can look like a sticker on a page. But heavy or dirty shadows can make it feel cheap. Balanced shadows are a key part of product photo retouching.
If you use natural shadows, clean them up so they look soft and controlled. If you add shadows, keep them consistent across the full set: same direction, softness, and opacity. Pay attention to contact shadows under the product, because that’s what makes the item feel grounded.
For marketplace white backgrounds, you may need very subtle shadows that still satisfy platform requirements. The point is to avoid a floating cutout look while keeping the overall image clean.
Match A Full Set: The Catalog Consistency Test
One perfect image is not enough. Your customer sees a set, a grid, a brand. Strong Product Photo Enhancing is consistent retouching.
Open 6 to 12 images together and compare them quickly. Ask yourself: do these look like the same photographer, the same studio, the same brand? Look for differences in brightness, background tone, color temperature, shadow strength, and crop framing.
Consistency matters even more when you have variants. If a red variant is darker and a blue variant is brighter, people may assume quality differences, even when the only difference is retouching.
Check Branding Details: Labels, Logos, And Text Must Be Readable
If your packaging sells your product, your packaging must be clear. Product Photo Enhancing should improve readability, not accidentally soften it.
Zoom in on label text and logos. Are they sharp? Is there glare hiding key claims? Are small typography details distorted because of lens perspective? Fix distortion where needed, especially for boxes, books, framed prints, and flat packaging.
Also double-check that retouching didn’t create strange artifacts around letters, especially after background cleanup or sharpening.
Control Perspective And Lens Distortion
Wide-angle distortion can make products look warped. Cylindrical items can bulge, boxes can look trapezoid-shaped, and straight lines can curve. In Photo Retouching Service, subtle perspective corrections can make products feel more real and premium.
This matters a lot for furniture, home goods, electronics, and anything with straight edges. If the product shape looks wrong, shoppers subconsciously lose trust.
Remove Unwanted Props, Tags, And Distracting Elements
Before images go live, scan for small distractions. A stray tag, a support stand, a mannequin clip, tape, or a reflection of something off-camera can ruin a premium look. Product Photo Enhancing is where you clean these up.
For apparel, remove pins, clamps, or mannequin marks if you are aiming for ghost mannequin or clean catalog styling. For product sets, remove anything not included in the purchase, unless it’s clearly meant as a styling prop in lifestyle imagery.
Keep Skin, Fabric, And Material Texture Real

If you sell clothing, bedding, towels, or anything texture-driven, you need careful restraint. Over-smoothing fabric makes it look cheap and plastic-like. Under-editing leaves wrinkles that feel messy. The right product photo retouching keeps the material honest while still looking presentable.
For apparel images, pay attention to seams, collars, cuffs, and fit lines. Remove distracting wrinkles and lint, but keep natural folds so customers can understand drape and thickness. That’s how you build confidence and reduce returns.
Validate Image Specs: Size, Format, Compression, And Background Rules

Even perfect retouching can fail if the file is wrong. Before going live, confirm the platform requirements. Different marketplaces and themes handle images differently, and compression can introduce banding or artifacts.
At minimum, confirm that the resolution supports zoom, the file size won’t slow your page, and the format is correct (often JPG for photos, PNG when transparency is required). If the background must be pure white, verify it again after export because compression can shift edges and tones. Product photo retouching is not finished until the exported file still looks clean.
Pre-Launch Review: A Simple 60-Second Checklist
Before you publish, do one fast scan like a customer would. Look at the thumbnail first, then the full image. If anything feels strange, zoom in and find the cause. Most bad images are not ruined by one big issue, but by five small ones stacking together.
If you want a quick pre-launch set of checks, keep these in mind:
- Check background and edges for halos, jagged lines, and uneven whites.
- Check color consistency across the full set, then confirm sharpness and shadow realism.
This quick pass catches most problems that lead to poor first impressions.
FAQs
What Is Product Photo Enhancing And Why Does It Matter?
Product Photo Enhancing is the process of cleaning, correcting, and enhancing product images for e-commerce. It improves clarity, consistency, and trust, which can increase conversions and reduce returns caused by inaccurate visuals.
How Do I Know If My Background Is Truly White?
Open the image and check the background values and corners. A true white background should look consistent with no gray gradients, color casts, or dirty patches, especially after exporting and compression.
Should Product Photo Retouching Change The Product Color?
No. Product Photo Enhancing should improve accuracy, not alter reality. Adjust white balance and exposure so the product matches the real item. Over-editing color can increase customer complaints and returns.
What Are The Most Common Retouching Mistakes In E-Commerce Images?
The most common issues are halos from poor cutouts, inconsistent color across a set, over-sharpening, crushed shadows, blown highlights, and unrealistic floating products caused by missing or incorrect shadows.
How Many Images Should Be Retouched For One Product Listing?
It depends on your category, but most listings benefit from a consistent set: a clean hero image, multiple angles, detail close-ups, and variant images. Product Photo Enhancing should match across all of them.
Final Thought
If you’re tired of second-guessing your edits right before launch, we can help. At Cutout Image Media, we handle Product Photo Enhancing every day for e-commerce brands that need reliable quality at scale. Send us a few images, tell us your style guidelines, and we’ll return polished, marketplace-ready results you can confidently put live.