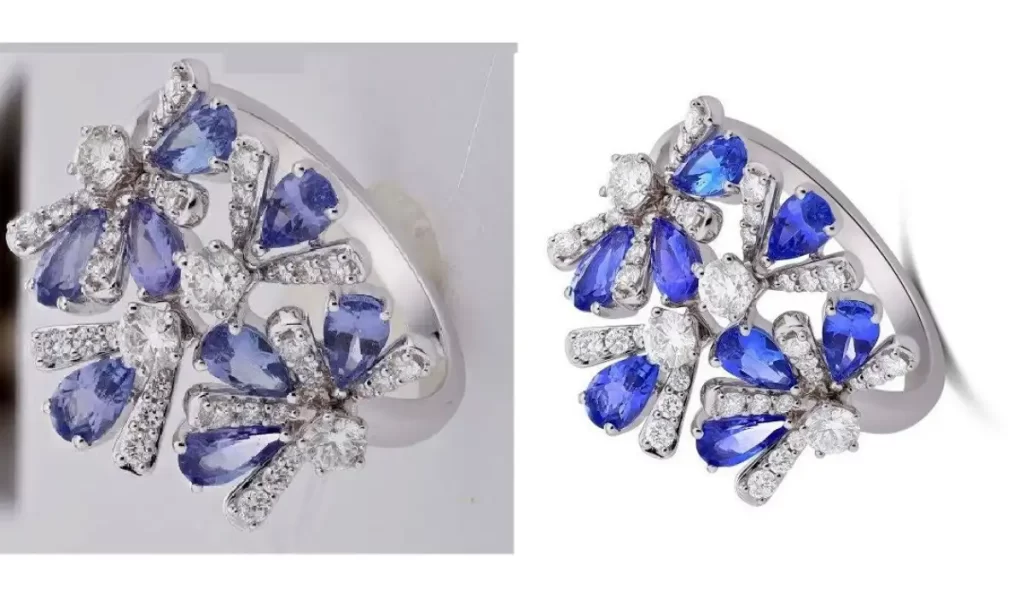
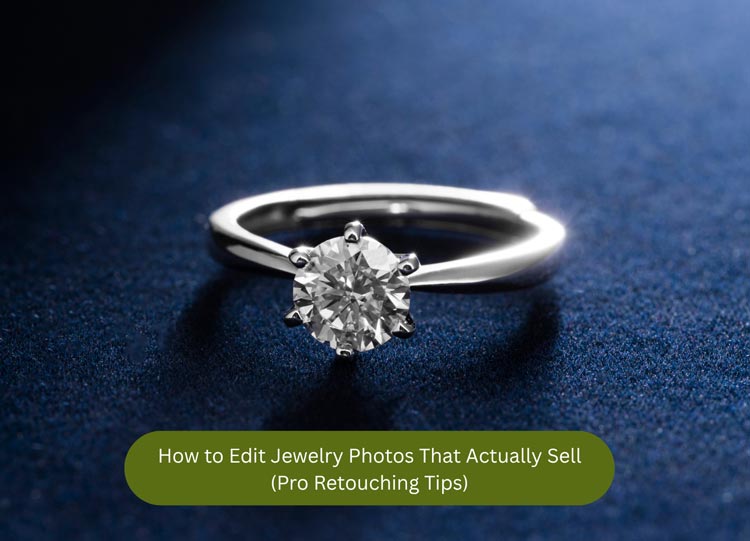
If you have ever tried photographing jewelry, you already know the frustrating truth. The piece looks stunning in real life, but the photo comes out dull, too warm, too cold, full of reflections, or simply cheap. That is exactly why solid jewelry photo editing tips matter just as much as lighting and a good camera. In fact, the difference between a scroll-past and a sale is often the editing.
Table of Contents
Why Jewelry Photo Editing Is Different Than Other Products
Jewelry is small, reflective, and full of micro-details. A ring can reflect your camera, your studio, the room, and even your shirt. Gemstones can lose their fire if contrast is off by a little. Gold can turn greenish, and silver can turn muddy. And because customers cannot touch the item, your photos must carry the full burden of trust.
That is why the best jewelry image editing is not about heavy filters. They are about control. Control over color accuracy, shine, texture, sharpness, and consistency across a product catalog.
The Goal: Looks Like Real Life, But Better

If your edits make the jewelry look unrealistic, returns go up and reviews go down. If your edits are too weak, the item looks flat and underpriced. The sweet spot is what we call truthful enhancement.
A good mental checklist looks like this: the metal should look clean, the stones should look lively, the shape should look accurate, and the background should look distraction-free. Most importantly, the piece should look consistent across your whole store, because consistency sells.
Start With A Clean Base: Camera Raw Or Lightroom Adjustments
Before you do any detailed retouching, fix the global issues first. This is where many editors waste time. They jump straight into spot healing, then realize the color is wrong and everything needs rework.
Here are foundational jewelry image editing tips for your base layer edits.
Get White Balance Right

Jewelry is extremely sensitive to white balance. A slightly warm edit can make diamonds look yellow. A slightly cool edit can make gold look pale.
If you shot with a gray card, use it. If not, use neutral areas like white background (if truly white) or soft highlights that should be neutral. Then fine-tune by eye, but always compare against the real product or a reference image.
Correct Exposure Without Killing Shine

Aim for a bright, clean look, but protect the highlights. Jewelry needs highlights to look premium. If you flatten highlights too much, the metal looks plastic.
Raise exposure gently, then pull highlights down just enough to recover detail. Lift shadows carefully to reveal shape, but avoid that washed-out HDR product look.
Add Contrast In A Controlled Way

Instead of cranking contrast globally, use a subtle S-curve or clarity/texture carefully. You want the prongs, engravings, and stone facets to show, but you do not want harsh edges or crunchy noise.
his is one of those editing techniques that separates beginner-level work from store-ready results from store-ready edits: micro-contrast should feel intentional, not aggressive.
Background Cleanup And Cutout: White Should Be Truly White

For e-commerce, background consistency is non-negotiable. Marketplaces like Amazon often require a pure white background (#FFFFFF) for main images. Even if you do not sell on Amazon, pure, clean backgrounds increase perceived value and reduce distractions.
Choose The Right Approach: Clean-Up Vs Full Clipping Path
If your background is almost white with wrinkles, dust, or gradients, you can sometimes clean it by brightening and smoothing. But if edges are complex or the background is inconsistent, a proper clipping path is safer.
Professional jewelry photo editing includes zooming in to 200% and checking edges around prongs, chains, and tiny gaps. If you see halos, jagged edges, or missing details, customers will feel something is off, even if they cannot explain it.
Avoid The Classic Halo Mistake
Halos happen when you cut out the jewelry and leave a thin fringe from the old background. They are especially visible around silver jewelry and diamonds.
To avoid it, refine edges using masks, decontaminate colors if needed, and inspect on both white and darker temporary backgrounds. This single habit dramatically improves quality.
Dust, Scratches, Fingerprints: The Invisible Work That Sells
Jewelry photography magnifies everything. A tiny dust particle becomes a distracting blob. Fingerprints on polished metal kill the luxury feel.
This is where your retouching time should go, and it is one of the most valuable photo editing tips for conversions: make the piece look freshly polished, but still real.
Use a combination of spot healing and clone stamp for different surfaces. Spot healing is fast but can smear texture if overused. Clone stamp gives control, especially on brushed metals or detailed engravings.
Take your time around prongs and stone edges. Sloppy cleanup can change the design and create misleading visuals.
Metal Retouching: Make Gold Look Rich And Silver Look Crisp

Metal editing is more than make it shiny. Real shine is structured. It has clean transitions, controlled highlights, and depth.
Keep Natural Gradients
Polished metals have gradients that show curvature. If you over-brighten, you destroy that curvature and the piece looks flat. Preserve the natural shading, then refine it.
A strong set of editing for metals includes subtle dodging and burning. Brighten key highlight lines, slightly deepen the opposite edges, and shape the metal so it looks dimensional.
Fix Color Casts The Right Way
Gold can pick up green from nearby surfaces. Silver can pick up warm casts from wood tables or skin tones. Instead of globally shifting color, target the metal area with a mask and correct selectively. This keeps gemstones and background accurate.
Keep Texture Real
If you apply heavy noise reduction or blur, metal can look like a smooth 3D render. Customers trust texture. Keep it clean, but not fake.
Gemstone Retouching: Boost Sparkle Without Lying
Gemstones sell on fire, clarity, and color. But gemstone retouching is where many brands go too far.
Bring Back Facet Detail
Use sharpening selectively. Global sharpening adds noise to the background and can create ugly edges. Mask sharpening to the stones and detailed areas only.
A practical gemstone sparkle photoshop approach is high-pass sharpening on a separate layer, then reducing opacity until it looks natural.
Enhance Sparkle With Local Adjustments
Instead of boosting saturation globally, add small local contrast and targeted highlights. Brighten tiny reflection points and keep blacks clean, because gemstones need deep contrast to sparkle.
Be Careful With Color Accuracy
If you sell natural stones, color accuracy is part of the product truth. You can make the image attractive, but do not shift a sapphire into an unreal neon blue. It will come back as a return.
Color Matching Across A Catalog: Consistency Is What Looks Expensive

One of the biggest reasons large brands look premium is simple: all their product photos match.
If you have 30 rings and each one has different white balance, brightness, or background tone, your store feels inconsistent. Shoppers may not say it, but they feel it.
A reliable workflow is to create a master edit style and apply it consistently, then fine-tune per image. These jewelry photo editing tools help you scale without losing quality.
Composition And Cropping: Make The Piece Feel Bigger And Clearer
Editing is also a presentation. Jewelry is small, so your crop must do the heavy lifting.
Keep spacing consistent. Center the product when required. Leave room for marketplaces that need extra padding. If you are creating lifestyle crops for social media, keep the focus on the hero detail, like the gemstone or signature setting.
Also watch straightening. A slightly tilted ring looks careless. Clean alignment makes photos feel professional.
Reflections And Glare: Reduce Distractions, Keep The Shine

Reflections are not bad. Ugly reflections are bad.
If you remove all reflections, jewelry looks dead. If you keep uncontrolled reflections, jewelry looks messy. The best ring photography editing is about shaping reflections, not deleting them.
You can reduce harsh glare with careful highlight recovery and localized adjustments. For advanced work, editors sometimes blend multiple exposures or manually paint controlled highlights. The idea is to make reflections look intentional and premium.
Shadows: Ground The Jewelry Without Making It Look Dirty

Flat cutouts on pure white can look like floating stickers. A soft shadow gives the product weight and realism.
Keep shadows subtle, soft, and consistent. Avoid harsh black shadows that make the product look used or dusty. For listings that require pure white with minimal shadow, keep it very light and clean.
The Over-Editing Traps That Reduce Trust
Some edits look impressive but harm sales because they reduce believability. If you want safe, sales-friendly jewelry photo editing,avoid these traps.
Over-whitening diamonds can remove detail and make them look like white blobs. Over-saturating gemstones can feel fake. Over-smoothing metal can make it look like plastic. Excessive sharpening creates crunchy edges and noise. And heavy contrast can make reflections look harsh and cheap.
When in doubt, step back, zoom out, and ask: does this still look like a real product a customer will receive?
A Simple Pro Workflow You Can Repeat
Most sellers do not need a complicated process. They need a repeatable one. Here is a clean workflow you can follow, and it aligns with the most effective jewelry retouching used in e-commerce.
- Start with RAW adjustments: white balance, exposure, highlight control, and gentle contrast.
- Clean background or do a proper clipping path and edge refinement.
- Remove dust, scratches, and fingerprints while preserving texture.
- Retouch metal with subtle dodge and burn for shape and premium shine.
- Enhance gemstones with selective sharpness, local contrast, and controlled sparkle.
- Match color and brightness across the whole set for catalog consistency.
- Add a soft, realistic shadow if your brand style allows it.
- Export in the right size, format, and compression for your platform.
Export Settings That Keep Your Images Crisp Online
Even perfect edits can look bad after export if compression is wrong.
For most e-commerce stores, high-quality JPEG in sRGB color space is a safe default. Keep dimensions large enough for zoom, but optimized for speed. If your platform supports WebP, it can reduce file size without obvious quality loss.
One of the most overlooked jewelry photo editing tips is to always preview your final image on mobile, because that is where many buyers will decide.
When It Makes Sense To Outsource Jewelry Retouching
If you are editing a few photos a week, you can handle it in-house. But once you are running product drops, seasonal catalogs, or hundreds of SKUs, editing becomes a bottleneck. Worse, rushed editing creates inconsistent results, and inconsistency quietly lowers conversion.
That is where a specialized team can help. At Cutout Image Media, we have been working in the image editing industry for 15 years, focusing on e-commerce and product photography post-production. Our designers handle the detailed work that jewelry requires, like clipping path precision, reflection control, dust and scratch cleanup, and natural-looking enhancement that still stays true to the product.
If your goal is to apply editing tips at scale, outsourcing can be the difference between we will get to it later and our product pages are always ready.
FAQs
What Are The Most Important Jewelry Photo Editing Tips For Beginners?
Start with correct white balance, clean background, and dust removal. Those three changes make jewelry instantly look more premium, even before you do advanced metal shaping or gemstone enhancement.
How Do I Make Diamonds Look Sparkly Without Over-Editing?
Use selective contrast and tiny highlight boosts on facets, not global exposure. Preserve detail, keep shadows clean, and avoid whitening so much that the diamond turns into a flat white patch.
Should Jewelry Photos Have Pure White Backgrounds?
For most e-commerce and marketplaces, yes. A clean white background builds trust and consistency. For branding, you can also use soft lifestyle backgrounds, but keep main product images standardized.
How Do I Remove Reflections From Jewelry Photos?
You usually reduce or reshape reflections, not remove them completely. Use highlight recovery, local adjustments, and careful retouching. The goal is controlled shine that looks intentional and realistic.
Why Does My Gold Jewelry Look Green Or Dull After Editing?
Color casts often come from lighting or surrounding objects. Use selective color correction on the metal only, keep white balance accurate, and avoid pushing saturation globally, which can distort the gold tone.
Final Word on Jewelry Photo Editing Tips
If you are serious about applying jewelry photo editing tips that actually move the needle, do not settle for good enough edits that make your pieces look average. We can help you create clean, consistent, premium-looking jewelry images that build trust and sell.