Learning Adobe Photoshop is a big change for every designer’s life. This mark is a special step to make your editing workflow way better. The Photoshop Tools you learn are worth practicing every day. Although many people these days use phone apps for quick edits, Master Photoshop Tools are undoubtedly the best, whether you edit photos or make design work.
Modern design workflows and photo editing workflows are evolving rapidly, blending traditional tools with powerful AI enhancements. From object replacement to class AI object removal, these features streamline the editing process for both beginners and experienced users. Platforms like Adobe Exchange offer easy access to add-ons that integrate with CAM Software and Modeling Software, enabling efficient techniques and extended techniques in creative work.
- Selection Tool – Helps isolate specific parts of an image for precise edits.
- Masking Tools – Allows you to hide or reveal parts of a layer without deleting anything permanently.
- Brush Tools – From retouching to digital painting, these tools offer endless creative possibilities.
- Adjustment Layers – Make color and lighting changes non-destructively for easy tweaks later.
- Clone Stamp Tool – Perfect for removing blemishes, objects, or duplicating areas.
- Layer Tool – Organize your work and keep control over every part of your design.
- Blend Modes – Combine layers in creative ways to achieve stunning effects.
- Transformation Tool – Resize, rotate, flip, or distort elements for the perfect fit.
- Liquify Tool – A go-to for reshaping features subtly or dramatically.
- Crop Tool – Improve composition and focus by trimming your images to perfection.
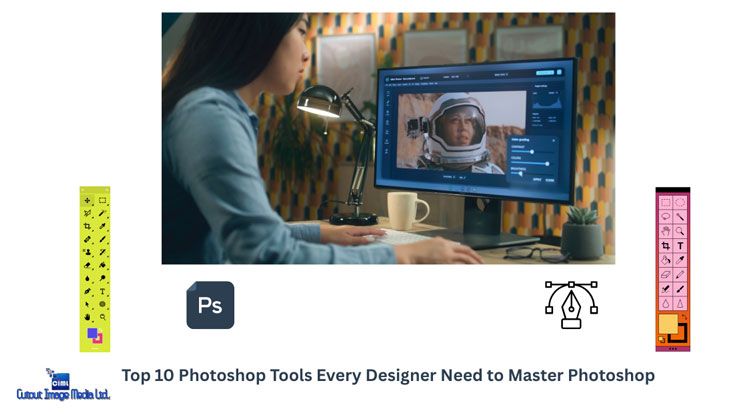
With the right tools at your fingertips, you can master any kind of photo editing, and that’s exactly what powerful editing software offers. Whether you’re fine-tuning a portrait, designing digital art, or creating social media content, learning how to use the core features is essential.
If your goal is to become a professional graphic designer, having a strong command of key tools isn’t just helpful, it’s non-negotiable. Here are 10 must-know tools that will level up your editing game:
Table of Contents
Selection Tools
Photoshop beginners and pros both should try a selection tool to make their edits look professional. Now, you may wonder how clicking around helps your pictures.
| Tool | Before | After |
|---|---|---|
Magic Wand |
Rough edges |
Clean cuts |
Pen Tool |
Jagged lines |
Smooth curves |
Blur Tool |
Sharp, distracting details |
Softened, less prominent details |
The clean edges and smooth lines from the Pen Tool can help you cut out things perfectly. This way, your pixel selection looks really good. Besides, the time you take to learn lasso tools and marquee tools will make you ready for design jobs where clean cuts matter most. Most importantly, these essential tools become more useful the more you practice.
Key Features:
- Lasso Tools: Freehand selections.
- Marquee Tools: Perfect squares/circles.
Example: Use the Pen Tool to cut out hair with pixel-perfect accuracy.
Think of these as your best tool friends when editing photos! The Brush Tool helps fix small mistakes with ease, while the Magic Wand Tool quickly grabs just the colors you need.
Use the Shape Tool for making clean circles and squares. And when things go wrong? The Eraser Tool works like magic, just like a photographer saving a bad shot. In the end, precision is what makes your work look truly professional.
Masking Tools: Isolate Like a Pro
Layer Masks are the best way to save your edits for a long time without ruining the original. Outfit picks, brush tools, and a special blending mode together make your non-destructive editing stand out. Whether you want a soft look, sharp cut, or artsy feel, try these mask tricks to make pictures show your true you.
| Mask | Best For |
|---|---|
Layer Mask |
Non-destructive edits |
Clipping Mask |
Textures/patterns |
Quick Mask |
Temporary selections |
Pro Tip: Set blending mode to Overlay for easier masking.
For edits that need extra care and detail, masks are your best friend. Use black or white brushes on a mask to apply changes only where you want them. Play around with blending modes like “lighten” or “darken” to create the right effect. Feather the edges for smooth transitions that look natural. Just like finding the perfect photo pose, precise edits with masks take time, but the results are always worth it. Masks are your editing superpower.
Simple Masking
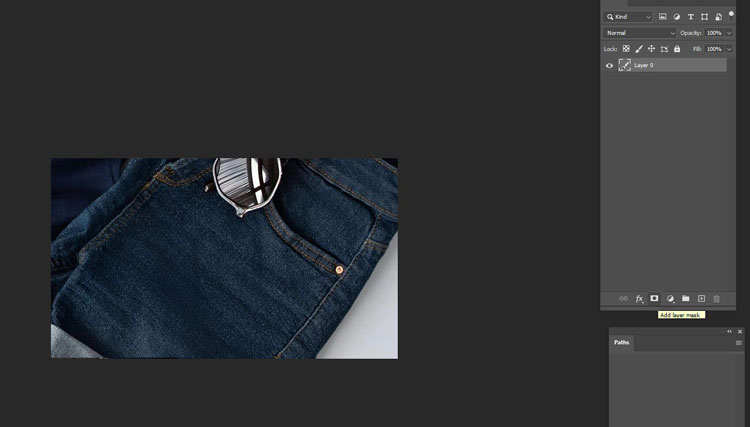
To change an image’s background using simple masking in Photoshop, start by opening your image. Then, open the background image you’d like to use, select it (Ctrl+A), and copy it (Ctrl+C).
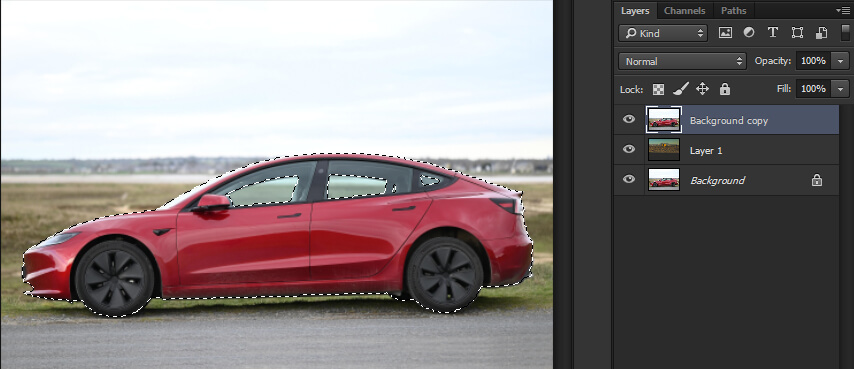
Switch back to your original image, create a new layer, and paste the copied background. In the Layers panel, drag this new background layer below the original image layer.
Now, select the top layer (your main image) and click on Add a Mask at the bottom of the Layers panel. Select the Brush Tool, make sure the mask is selected, and begin brushing away the old background. As you brush, the new background will start to appear. With a little patience, you’ll get a clean and beautiful result.
Layer Mask
Layer masking is another powerful method for replacing image backgrounds. Start by opening your image in Photoshop and unlocking the background layer by double-clicking the lock icon.
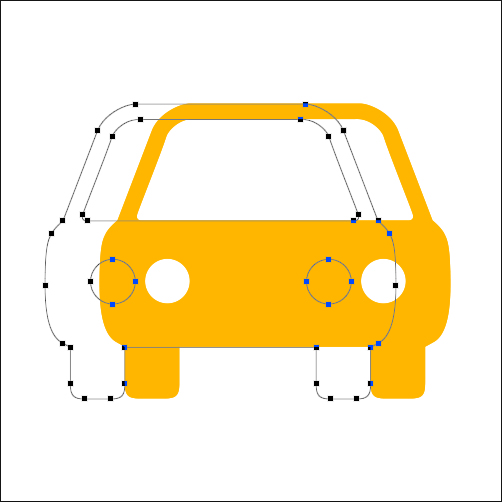
Use the Pen Tool to carefully draw a path around your subject. Zoom in for better accuracy and try to stay 1–2 pixels inside the edge. If your subject has internal cutouts (like holes), create paths for those too.
Once you’re done, press Ctrl+Enter to turn the path into a selection. Press Delete to remove the background. To isolate the main subject, use Ctrl+Shift+I to invert the selection before deleting.
Now, insert a new background: create a new layer, drag it below your subject layer, and use the Paint Bucket Tool or add a new image. Just like that, you’ve got a clean, background-replaced image.
Alpha Channel Masking
Alpha channel masking is perfect for images with fine edges like hair, fur, or transparent fabric.
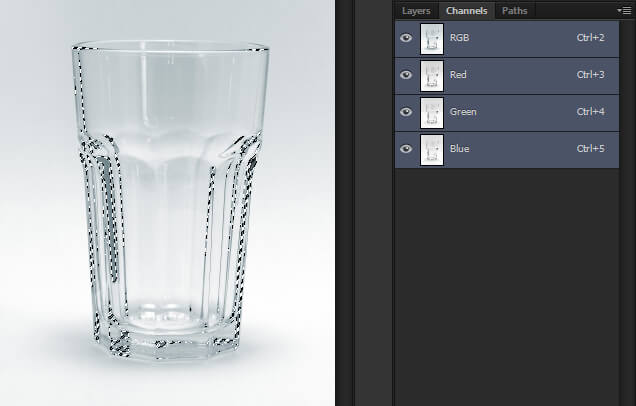
First, open your image and unlock the layer. Duplicate the layer, then go to the Channels tab. Pick the channel with the highest contrast (usually Blue) and duplicate it.
Make only the duplicated channel visible. Invert it using Ctrl+I, and adjust the contrast using Ctrl+L (Levels) to make the background completely black.
Now, use the Pen Tool or Lasso Tool to select the main parts of the subject (like the body and face). With white as the foreground color, press Ctrl+Enter to make a selection, then Ctrl+Delete to fill it with white. Deselect with Ctrl+D.
Use the Dodge Tool (set to Highlights) to clean up any remaining parts. Then, go to Select > Load Selection, choose the duplicated channel (e.g., Blue Copy), and press OK.
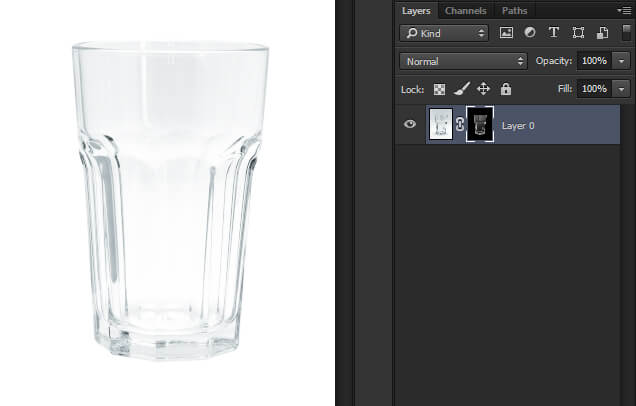
Back in the Layers tab, click on the original layer and then on Add a Mask. Finally, hide the base layer (click the eye icon), and you’ll see your subject with the background cleanly removed, ready for any background you like.
Brush Tool: Unleash Creativity
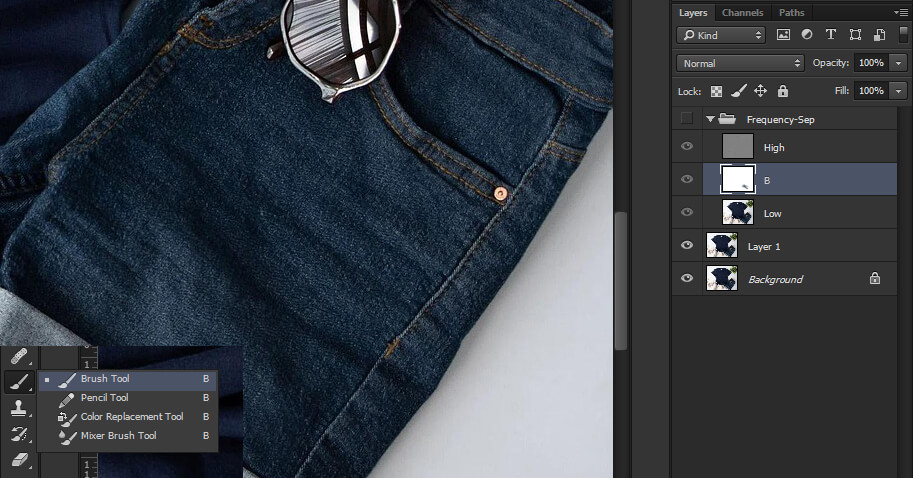
Are you a creative person? Try the Brush Tool to make art-style edits. Changes made with brushes will bring back the fun of painting when you see your work later.
The Brush Tool works best when you play with opacity or try different editing techniques. Painting with soft brushes or using the option bar to change size can create amazing effects. Standing your brush strokes against a dark background will make colors pop. You can also explore the range of options by testing all the brush settings.
“Brushes are just for painting!”
Truth: Adjust opacity (100% for bold, 10% for subtle) and flow for pro-level effects
3 Must-Try Brushes:
- Soft Round: Smooth blending.
- Hard Round: Sharp details.
- Mixer Brush: Paint-like textures.
Healing Brush Tool
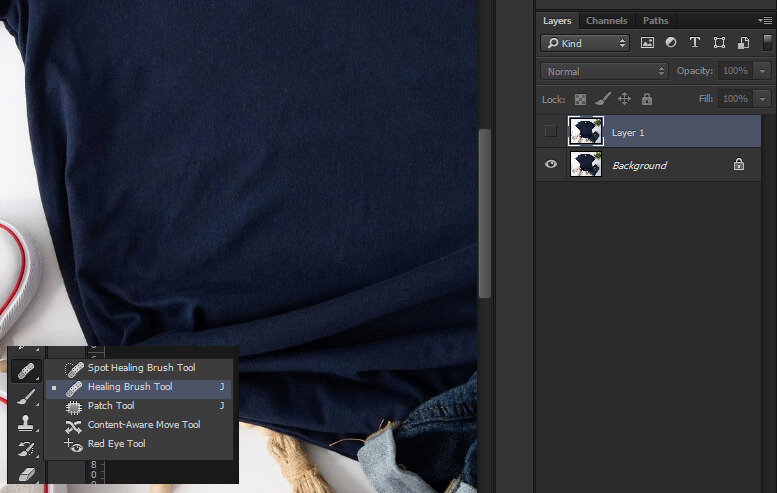
The Healing Brush Tool in Photoshop is perfect for removing spots, blemishes, or any unwanted marks from an image. To use it, first open an image that has visible spots or imperfections.
Select the Healing Brush Tool from the toolbar. Then, press and hold Alt and click on a clean area of the skin; this sets your source point. After that, simply click on the spot you want to fix. Photoshop will blend the clean area into the spot, making it disappear seamlessly. It’s an easy and effective way to clean up your images!
History Brush Tool
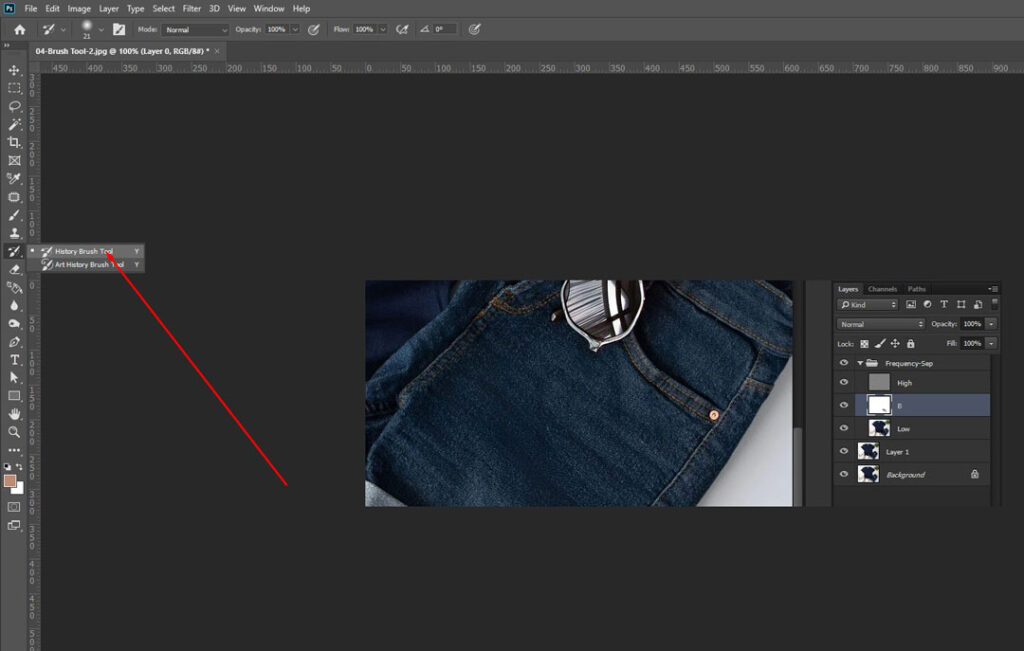
The History Brush Tool lets you undo changes selectively. Think of it as a way to “paint back” the original version of your image.
If you accidentally overuse the Healing Brush or apply edits in the wrong area, just select the History Brush Tool. Then, brush over the area where you want to bring back the original detail. It works like a soft, targeted version of Ctrl+Z, helping you fix mistakes without undoing your entire progress.
For the best results, start by using Exposure settings to brighten or darken specific areas. Explore the different options in the Brush Settings panel to unlock creative control.
Adjust the opacity for smooth color blending that feels natural. The Brush Tool is like your favorite downtown, full of hidden gems and creative spots to discover. Mastering brushes means endless possibilities for unique and beautiful art!
Clone Stamp: Fix Flaws Fast

The Clone Stamp is the perfect tool for fixing photos if you want clean retouching. This shows how you can make bad pixels disappear like magic. The smooth fixes and matching image pixels make the picture look perfect again. You can copy good sample pixels to cover spots or blend adjoining pixels to hide wrinkles.
When a model’s skin needs retouching but the patches stand out too much, subtlety is key. Use the Healing Brush to blend both texture and tone seamlessly. The Clone Stamp is great for copying exact pixels without drawing attention. For natural-looking dodging, keep exposure around 9–10%, just enough to enhance without overdoing it.
Color saturation and color matching help create visuals that pop and feel consistent. White backgrounds and the use of white color can add a clean, modern look, especially when working with 3D objects or foreground color layers.
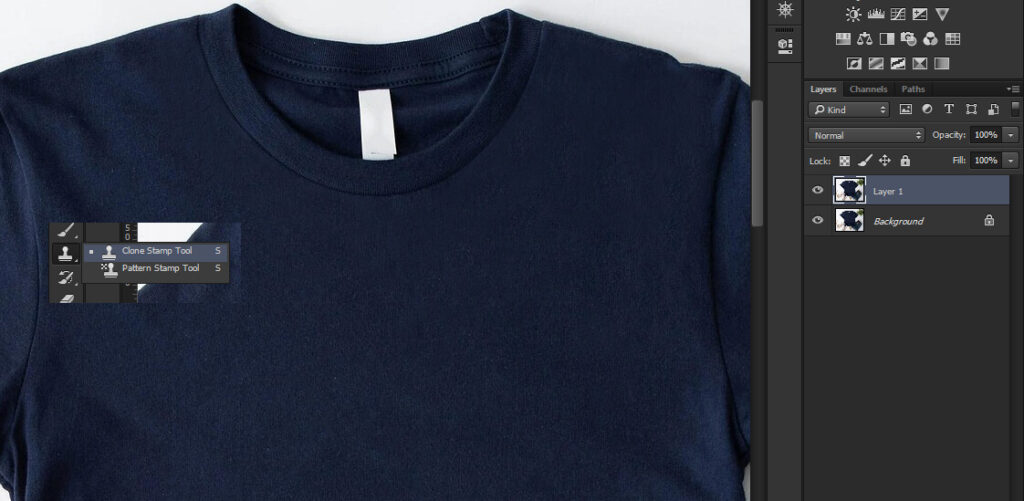
Using the Clone Stamp Tool in Photoshop
The Clone Stamp Tool is a powerful feature in Photoshop that helps you remove unwanted spots or objects from your images. Let’s walk through two simple but useful tasks you can do with it.
Removing Spots from an Image
To begin, open your image in Photoshop and duplicate the layer (right-click > Duplicate Layer). This protects the original image in case you want to go back.
Now, select the Clone Stamp Tool from the toolbar. Hold Alt and click near the spot you want to remove; this sets the source area the tool will clone. Then, click on the spot, and you’ll see it disappear, replaced with the surrounding area.
Tips:
- Choose a clean area very close to the spot for better blending.
- Use the left/right bracket keys to resize the brush to match the size of the spot for a more precise touch.
Repeat this process for each spot, and your image will look much cleaner in no time!
Removing Objects from an Image
You can also use the Clone Stamp Tool to remove entire unwanted objects, like a sign, trash bin, or person, from your photo.
Open the image and, again, duplicate the layer for safety. Use the same method as above: Alt+Click near the object to select a clean area, then click and paint over the object bit by bit. With patience and careful brush control, you can completely erase the object while blending in the surrounding area naturally.
Here’s a look at the before and after results to show how effective this tool can be.
Tools like the History Brush and duplicate layer feature give designers flexibility to try advanced techniques while easily undoing changes. Adobe Creative Cloud supports these workflows, making it a favorite among advanced users who work with detailed design elements. The eye icon helps toggle layers on and off, offering better control during the creative process.
For the best pixel selection, start by picking a clean area with the Clone Stamp to copy from. Use a small brush for tiny pixel fixes, especially on delicate details. Adjust the brush softness to blend smoothly with the skin or background. Think of the Healing Brush like a picnic blanket; it gently covers flaws and makes everything look nice. Flawless edits = happy clients!
Adjustment Layers: Edit Without Ruining Photos
Adjustment layers are the best way to change photos without breaking them. Whether you edit every day or just sometimes, the color correction and safe edits will make you feel free to try new things. Usually, pros use layers for all their work. So naturally, you already know they’re important.
| Problem | Adjustment Layer Fix |
|---|---|
Overexposed |
Sky Curves layer |
Dull colors |
Vibrance layer |
Flat contrast |
Levels layer |
Example: 50% gray layer + Overlay mode = non-destructive dodging/burning,
Don’t know how to use the layer panel? No problem. Adjustment layers will be your new best friend and save your work every time. You can play with layer blending modes or use Layer Masks to hide changes. Clicking, testing, or changing your mind won’t hurt the Background layer at all.
How to Use an Adjustment Layer in Photoshop
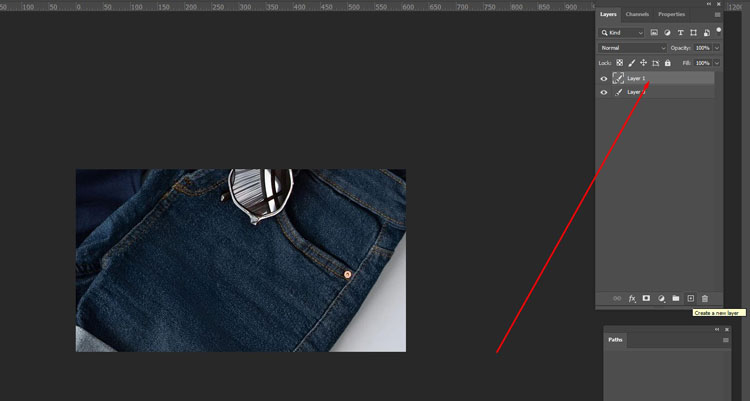
Step 1: Set Up Your Layers
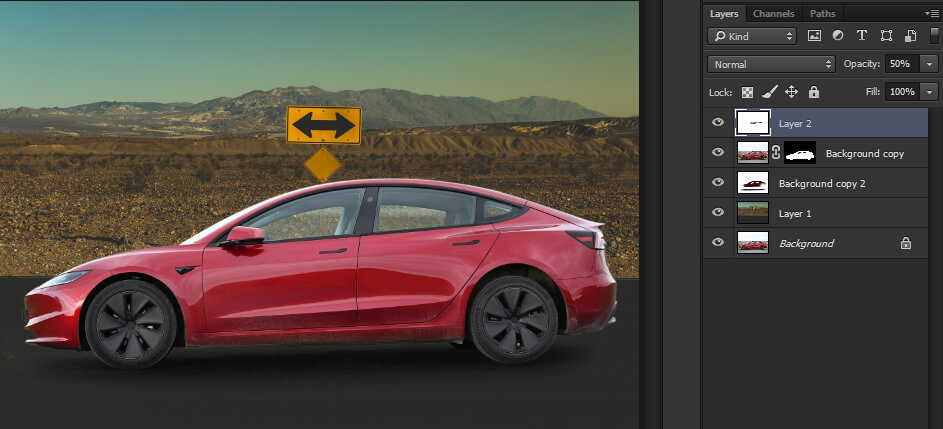
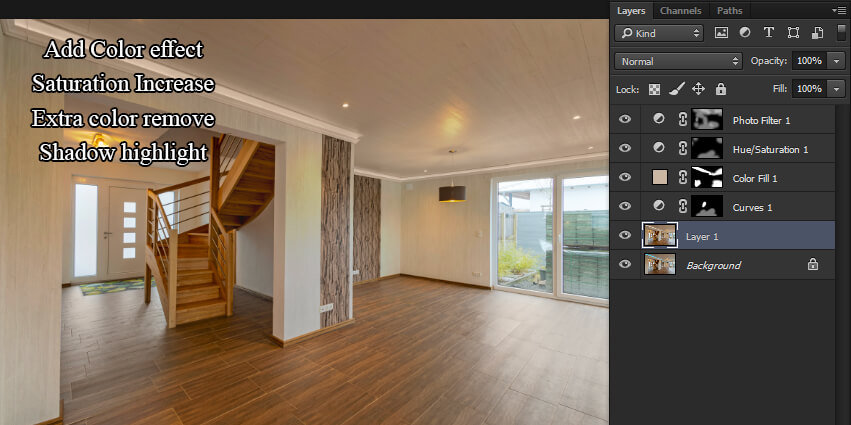
Start by opening multiple images on the same canvas, each on a separate layer. For example, you might have four layers with different images, as shown in the example.
Step 2: Add an Adjustment Layer
Now, select the top layer (e.g., Layer 4) and click on the Adjustment Layer icon at the bottom of the Layers panel. You’ll see several options pop up; choose one like Hue/Saturation to adjust the colors.
Once selected, you’ll see a Hue/Saturation panel appear, along with a new Adjustment Layer added just above the layer you had selected.
Step 3: Apply the Effect
Move the Hue and Saturation sliders to change the color of your image. Since Adjustment Layers affect all the layers beneath them, this change will apply to every layer below the Adjustment Layer.
For example, if you place the Adjustment Layer above Layer 4, all layers (1–4) will be affected. If you place it above Layer 2, then only Layers 1 and 2 will be adjusted.
Step 4: Control What Gets Affected
If you only want certain layers to be affected, simply drag the Adjustment Layer so it sits above the layers you want to change and below the ones you don’t. For instance, if you drag the Adjustment Layer below Layers 3 and 4, only Layers 1 and 2 will show the color change.
Step 5: Easily Revert Changes
One of the best things about Adjustment Layers is that they are non-destructive. If you want to go back to the original image, you can simply hide the Adjustment Layer by clicking the eye icon or delete it altogether. No permanent changes are made to your original images.
Here are some of the best image layer tricks: Always put color correction on the top active layer for full control. Think of layers like clear plastic sheets stacked on each other; each one adds something without messing up the rest.
Try different adjustment layers until your photo looks just right. Layers are like beach waves; you can play around without ruining the whole picture. Adjustment layers = safe, undo-friendly editing!
Crop Tool
The Crop Tool is the perfect tool for fixing your composition in image editing. The clean edges and straight lines are the best ways to make your photos look pro. You can also use the power of non-destructive editing to try different crops without losing quality.
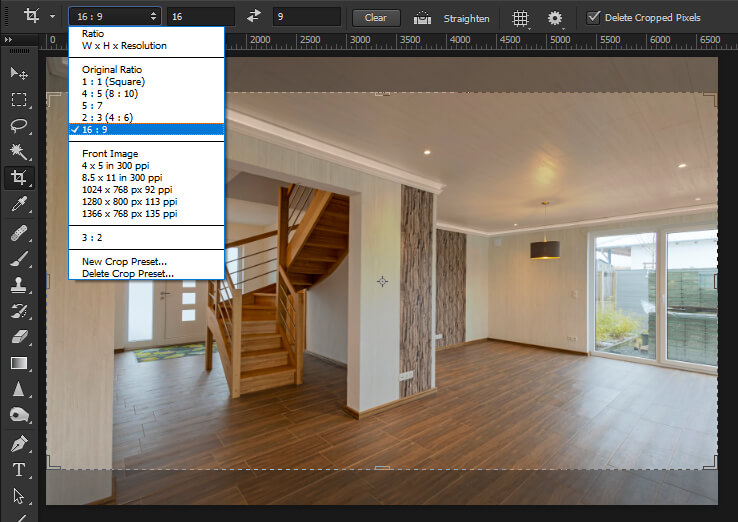
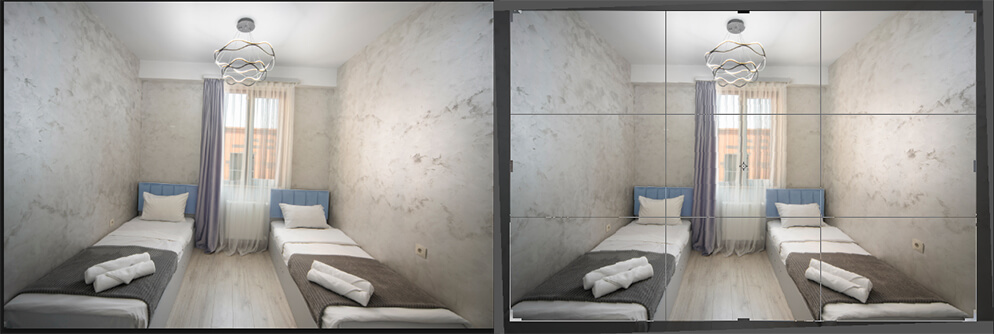
Checklist for Pro Cropping:
- Rule of thirds (enable grid).
- Straighten horizons (auto or manual).
- Preserve resolution (uncheck “Delete Cropped Pixels”).
For the best editing workflow:
Use a Crop Tool to remove distracting stuff. Try different ratios for photo editing projects. Keep the editing process simple with basic cuts first.
Basic image editing gets better when you:
Pick a good graphics editing program. Learn image editing software tricks. Sometimes use image editing services for hard jobs
The Crop Tool works like a vintage fence – it helps frame your picture perfectly! Great crops = stronger visuals.
Blending Modes: Transform Images Instantly
Do you love making magic with photos? Blending modes in Photoshop are perfect for showing your creative side. Try different effects like Multiply for darkening or Screen for lightening to make your layers pop. You can mix colors, textures, and photos to create wild new looks.
Top 3 Modes to Know:
- Multiply: Darken (perfect for shadows).
- Screen: Lighten (great for highlights).
- Overlay: Boost contrast/texture.
Pro Tip: Use Soft Light at 50% opacity for subtle enhancements.
Creating strong business content is easier than ever for today’s content creators, thanks to tools that support any content format, from social posts to ads.
Whether you’re creating content for a campaign or building eye-catching marketing content, modern tools offer additional features like advanced AI features, which boost productivity.
Many pros have a favorite feature, such as Batch mode for speed, or Blend modes and eraser modes for creative control. These tools support a nondestructive workflow and allow for custom workflows, giving you the freedom to experiment while keeping your original work safe.
How to Blend Two Layers in Photoshop
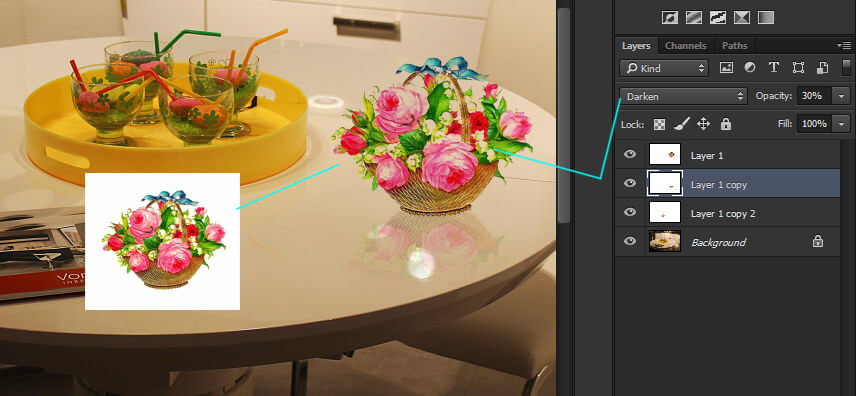
Step 1: Open Your Images
Start by opening both images in Photoshop. They’ll appear as two separate layers on the same canvas. Place the texture image below the main subject; this texture will be your background.
Step 2: Arrange the Layers
In the Layers panel, drag the background texture underneath the main image layer (e.g., a person or object you want to highlight). This setup ensures the subject stays on top while the texture shows through from the back.
Step 3: Apply a Blending Mode
Now, click on the top layer (your main image), and locate the blending mode dropdown at the top of the Layers panel. By default, it says “Normal.”
Click it, and try different blend modes like Multiply, Screen, Overlay, or Hard Light to see how each one interacts with the texture underneath. For this example, we chose Hard Light, which gives a bold, high-contrast look.
Step 4: Choose the Best Look
Experiment with the various blend modes until you find the one that works best for your image combo. Each mode will give a different effect depending on your subject and background.
For the best techniques:
Use Overlay blending mode for cool contrast. Try Color Dodge for bright effects. Experiment with different layers like a pro
Blending modes are like sports gear – the right one makes you perform better! Blending modes = 1-click magic.
Transformation Tools: Get Ready to Morph Your Masterpiece!
Apart from basic edits, tools like feature brushes, healing spots, or magic wand are great for pro edits. You can add cool effects and make pictures look super fancy with these advanced features. The way light plays with facial features during the golden hour makes photos look magical. Girls can smooth skin or brighten eyes to get that perfect glow. Guys can sharpen jawlines or tweak shadows for a bold look.
Poses that work best with these tools are fixing blemishes, adjusting colors, or playing with layers. The action of blending layers gives awesome chances to make flawless edits.
Key features like Liquify help reshape stuff easily. And powerful features like smart objects keep the quality high, no matter how much you edit.
Layer: Stack It, Style It, Slay It!
Layers are like building blocks for your edits. Whether you use Layer Masks or image layers, they help make your work look pro. You can stack them like pancakes to create cool effects and keep your edits neat. The Background layer is like the floor; everything sits on it.
The layers panel is at the heart of creating professional-quality results in photo editing. Whether you’re working from the left corner of the screen or using tools like the paint bucket, each element adds depth to your design.
You can remove elements from images, add additional space, or even bring your ideas to life with ease. Whether you’re editing a batch of photos or working on intricate designs, the right brush sets can turn digital images into truly stunning images, all while preserving the essence of the original image.
The active layer is the one you’re working on right now. Just like picking a toy to play with, you click on it in the layer panel. The concept of layers is simple: more layers mean more control. You can hide them, move them, or mix them with layer-blending modes to make magic.
Poses for layers? Try clipping, masking, or blending. The action of dragging and dropping layers gives you endless ways to make art.
Liquify Tools
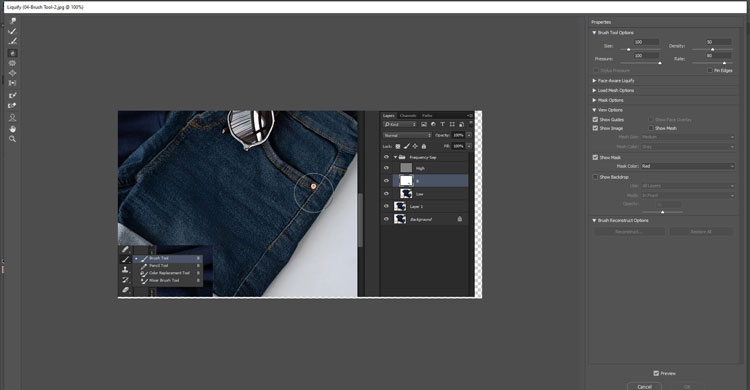
Editing photos is fun when you have the right tools, and Liquify is like magic for your pics. Make your photos wild by melting, twisting, and warping stuff like a wizard! Play around with faces, make smiles bigger, or fix little mistakes super easily.
Your edits should be as cool and special as you are. Getting awesome pictures needs some practice and big ideas. Whether you are new or pro, these quick Liquify tricks will make every pic look amazing.
Modern editing tools make transforming photos easier than ever. With basic color correction and a bit of color punch, you can enhance your image color and achieve perfect color balance.
Features like Magic Color help match identical color tones across elements, while layer management and adjusting layer opacity allow for better creative control.
Tools now offer accurate one-click background removal, background expansion, and even instant background swap, whether you want a clean white or dramatic black background. It’s never been easier to achieve excellent background removal in just seconds.
Try matching colors or shapes to make your edits pop. Take lots of tries till you are happy. Remember that time you laughed so hard? Bring that fun into your edits! Real happy faces make the best pictures.
With Liquify, you can bend anything you want, just like Play-Doh! Fix a weird shadow, make hair flow better, or just go crazy and see what happens. The more you try, the more magic you make!
FAQs
What’s the #1 tool for beginners?
Brush Tool: It’s versatile and easy to learn.
How do I cut out objects cleanly?
Pen Tool for hard edges, Select Subject for quick cuts.
Why use adjustment layers?
They’re non-destructive; edit anytime without losing quality!
What’s the best retouching tool?
Healing Brush for skin, Clone Stamp for objects.
Final Thoughts
Digital painting has come a long way with the help of powerful photo editing tools and a wide mix of design tools. From achieving accurate selections to experimenting with coloring tools, users can now create incredible visuals with ease.
The eyedropper tool, the Patch Tool, and the Auto Color feature all enhance workflow, while generative AI tools and hidden tools unlock even more creative potential. Whether you’re working with digital painting tools or exploring new color options, these extra tools give artists everything they need for next-level creations.
Ready to edit like a pro? Visit Cutout Image Media to hire editors who are already pros!