Ever snapped the perfect photo only to find it ruined by that annoying shine? Whether it’s a blinding reflection on your glasses, a hotspot on your skin, or a flash that turns your face into a spotlight, don’t worry! In this guide, we’ll show you how to Remove Glare, Remove Glare in Photoshop, and yes, even Remove Flash Glare with ease. Say goodbye to unwanted shine and hello to flawless photos. Got a sunglass reflection messing up your shot? We’ve got that covered too!
Photoshop and fixing shiny spots are like two best friends. Flash pictures have bright white blobs that need fixing to make the image look nice. The normal problems in photos are shiny noses, white circles on glasses, and too bright foreheads.
Many apps say they fix glare. But the good job they do does not match real Photoshop fixing. This is because pro photo fixers use special tools and smart buttons in Photoshop. The hand-moving fixes are done, making sure every shiny spot disappears properly. This careful fixing is not in free phone apps or quick filters.
Table of Contents
What is Flash Glare?

Flash glare looks real when the picture shows true colors. But not every photo has perfect lighting. Some may have ghost circles, shiny spots, or white blobs. Photoshop tools can hide these shiny things and make pictures look their best. Although glare mostly happens on glasses, it doesn’t mean faces without glasses don’t get it.
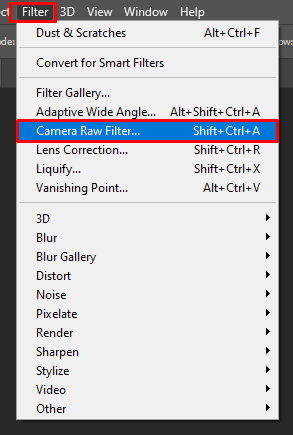
The Camera Raw Filter in Adobe Photoshop is a powerful tool for photographers and editors looking to enhance image quality with precision. By accessing Adobe Camera Raw, users can make non-destructive edits to their photos, adjusting exposure, color balance, and sharpness straight from their digital camera files.
Remember not to make fixes too much. Big deletes make pictures look fake and ruin the real look. Too much darkening makes skin look gray and weird. So use soft tools to keep faces natural. Glasses people can use clone tools to copy good spots over shiny parts.
This essential feature is part of the Adobe CC subscription, ensuring that creatives always have access to the latest tools and updates for optimal editing workflows.
Causes of Flash Glare in a Photograph
Apart from cameras, things like windows, jewelry, or wet streets make bad glare too. You get ugly, bright spots that hurt the picture’s feelings. The bounce back of light from flash hitting shiny things makes annoying white circles. Sweaty people’s forehead shines. Glass tables make light explosions.
Stuff that makes glare is light hitting straight back. Like when flashpoints are directed at glasses or metal. Standing near mirrors or under ceiling lights makes the worst glare. Rain makes puddle reflections, too.
Steps to Removing Glare in Photoshop editors and beginners should try Photoshop to fix glare and feel proud. Now, questions like how computer stuff helps fix photos may pop into your head.
The nice words from teachers help you learn the tools better. This way, you feel stronger with Photoshop. Also, the more you try to understand, the more you are ready for real photo jobs where fixing pictures is important. Most big, fixed pictures make people smile years later.
Remove glare from a Photo on iPhone
Getting glare in your iPhone photos is like when the sun ruins your perfect shot. This marks a big problem when you are trying to capture special moments that can’t be retaken. The memories in these pictures are important, but the glare makes them look all shiny and weird. Although most people just use filters or apps to fix it, removing glare properly is the best way, whether you wanna print the photo or keep it on your phone forever.
When dealing with unwanted elements in an image, the Remove Tool and removal tool options in Photoshop are game-changers. Whether you’re fixing blemishes or cleaning up backgrounds, these tools work seamlessly with high-resolution files captured by camera sensors. Combined with the editing power of Camera Raw, these features give users total control over image quality and presentation.
Moreover, glare-free photos show the real colors and details that make the picture special. Friends and family love to see clear photos without annoying bright spots, share them online, or even frame them nicely. Blurry edits or just ignoring the glare is not good for saving your best moments the right way.
But don’t worry! Your iPhone has tools to fix glare easily. You don’t need to be a pro – just tap a few things and bam! The photo looks good again. These shiny spots don’t gotta ruin your memories anymore!
Steps to Removing Flash Glare in Photoshop
Are you tired of flash glare ruining your photos? Try fixing them in Photoshop to make your pictures look pro again. When you remove that bright white spot, the photo will show all the details that got hidden by the annoying flashlight.
Some glasses are easy to fix if they are small, but big ones might need more work. Don’t worry, though – with little practice, you can make any photo look perfect again. Just remember to save your fixed photos with new names so you don’t lose the original!
1. Use the Lasso Tool
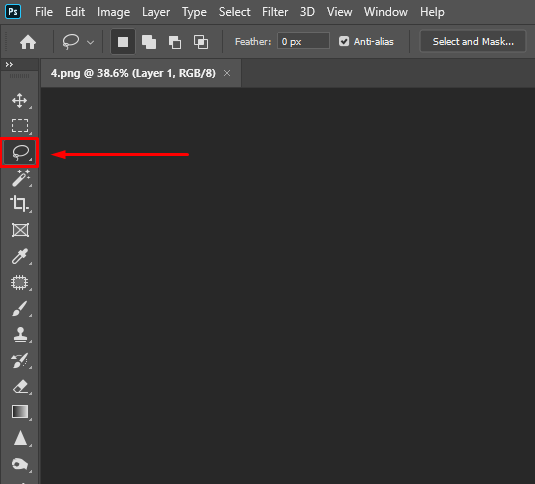
Using the lasso Tool holds big, happy feelings. The excitement of drawing shapes around shiny spots makes you feel smart. This is a great trick for making ugly glares disappear. Are you sad seeing white blobs in pictures? You can try this tool too and make clean photos following our steps.
This full guide shows Lasso Tool magic. We write every needed thing, like how to k-drag circles, how to make edges fuzzy, and how to cut glare bits out. Just draw round glare, soften edges, press delete! Simple like coloring.
2. Dehaze Image in Camera Raw
Do you like nature photos? Try the Dehaze slider to make foggy pictures clear. Sliding in Camera Raw brings back colors hidden by white mists. Dehaze works best when you move the slider slowly. Watching the fog disappear bit by bit makes me happy. You can also fix whole photos that look gray or dull this way. Makes outdoor pictures shine nicely!
The Generative Fill feature in Photoshop brings AI-powered editing to a whole new level, allowing users to expand and transform images with stunning realism. Paired with Camera Raw masks, editors can isolate specific areas for targeted adjustments, enhancing creative control. Tools like the Dehaze Tool also come in handy, especially when clearing up foggy or low-contrast photos for a cleaner, more vibrant finish.
This tool is magic for fixing hazy skies and misty mountains. Just slide right and watch gray clouds turn blue again! Water pictures get extra sparkle when you use Dehaze gently. Don’t push too hard, or colors get weird. Little moves make big differences.
3. Paint Glare Away with the Clone Stamp Tool
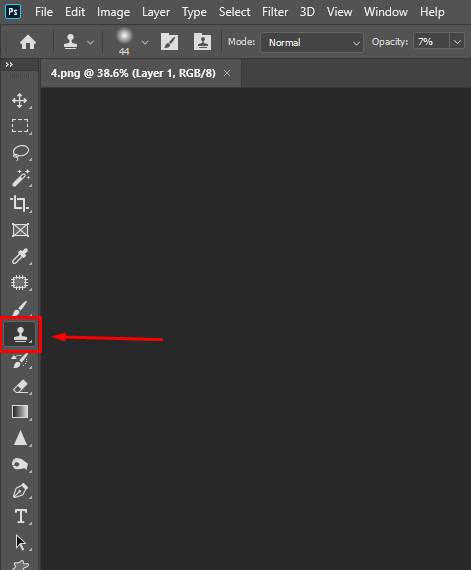
The clone stamp tool holds a lot of power for photo fixing. The happiness of copying good spots over shiny blobs makes you feel like an artist. This is a classic trick every editor should know. Are you tired of seeing the same glare problems? You can master this tool and make perfect pictures following our simple steps. This full lesson shows clone stamp secrets.
We told every important thing, like brush sizes, sample points, and soft clicks. Set the brush soft and small. Hold ALT to copy good skin near glare. Then click-click over shiny spots like gentle rain. Change sample points often for the best match. Fix glasses glare by copying clean lens parts. Clone stamp is a kind of glare removal when used patiently.
4. Add an Adjustment Layer
Photoshop and adjustment layers are like two twins helping. Glare photos have color problems that need fixing to make the picture look normal and good. The normal troubles are blue tints, weird skin colors, and dark shadows from flashes. There are many quick fixes people try. But the color fixing they do not match the adjustment layers. This is because pro photo fixers use layers and special sliders like magic wands. The layer work is made, making sure every color gets fixed gently. This smart color work is not in simple apps or fast buttons.
You find adjustment layers in the layer menu. Click “new adjustment layer” and pick “levels” or “curves”. Then slide the pointers till shiny spots blend with skin. Use layer masks to hide fixes where not needed. This way, only glare spots get fixed, not the whole face. Adjustment layers are smarter than normal tools cause you can change them later if not perfect.
5. Add a Color Layer
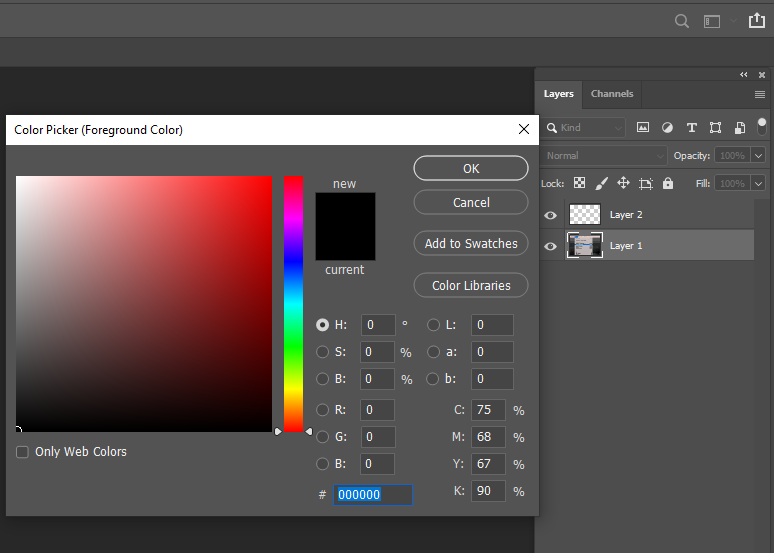
Color layers make pictures look real when the colors match true. But every glare doesn’t make the same bad colors. Some may have yellow spots, green tints, or red blobs. Color layers can fix these wrong colors and make the skin look its best. Although color layers mostly fix skin, it doesn’t mean other things don’t need it. Remember not to add too much color. Bright purples or greens make pictures look like fake cartoons.
Make a new color layer by clicking the circle icon at the bottom of the layers. Pick “solid color,” then choose skin color from the good part of the face. Change layer mode to “color” in the dropdown. Now paint over glare spots with a soft brush. This puts the correct color over shiny white blobs. Lower opacity if it looks too strong. Color layers are magic for fixing glasses glare and forehead shine.
6. Use the Brush Tool
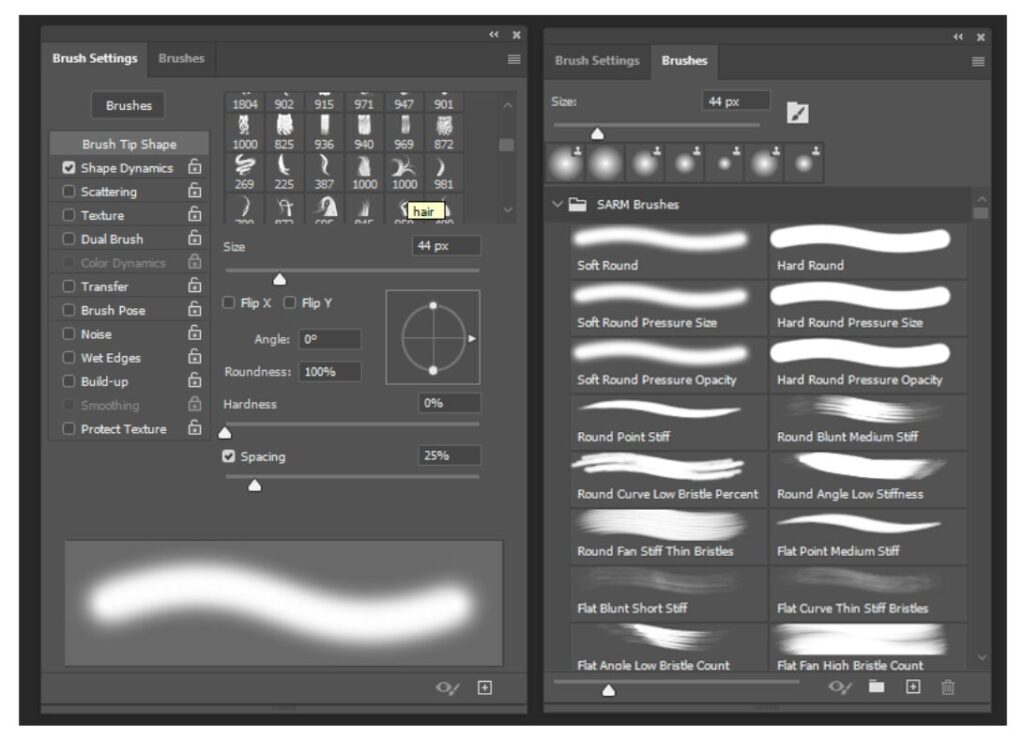
The brush tool is your best friend for tiny glare fixes. You add little color dots or fix edge spots gently. The painting with a brush that you do carefully looks invisible. Soft brushes fix skin glare gently. Hard brushes fix glasses blobs sharply. Brushes that work well are set to a low opacity. Like when you paint skin color over a shiny nose.
Precision editing is made easier with classic tools like dodge & burn tools, which help refine highlights and shadows for more depth and drama. The Healing tools are essential for quick touch-ups, smoothing out imperfections without damaging the overall texture. Meanwhile, the Zoom Tool ensures every detail is visible, making it easier to fine-tune your edits with accuracy and finesse.
Pick a brush tool, then choose a small size. Set hardness to 0% for soft edges. Lower opacity to 20% for light painting. Sample good skin color by holding ALT-click. Then dab-dab over the glare spot light like feathers. Zoom close to see better. Fixing with a brush takes time, but it looks most natural. Great for fixing small shines on nose tips or cheekbones.
Final Thought
Ready to make your photos glare-free and flawless? Learn how to Remove Flash Glare in Photoshop like a pro. Visit Cutout Image Media for expert tips and photo editing services that shine without the glare!
Photo editors and beginners both should know that glare can be good sometimes. Now, questions like why keep some glare maypop in your head. Learning from fixing glasses helps you understand lights better. This way, you get smarter with camera tricks. Also, the trying you try to fix makes you ready for art photos where glares make pretty sparkles.