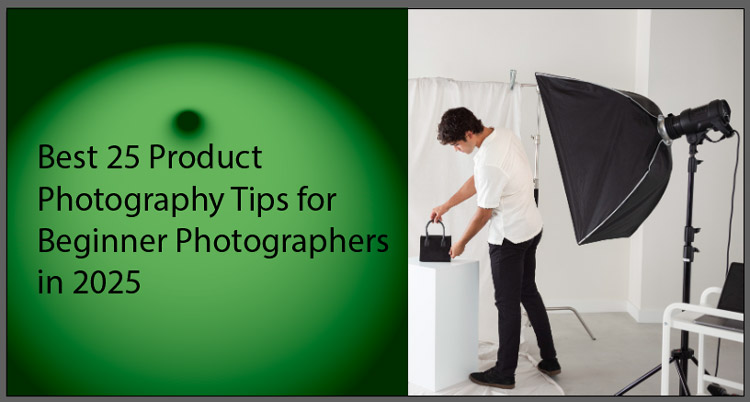
Looking to up your game? These product photography tips are perfect for beginners! Get essential photography tips for photographers diving into product photography and learn how product photo editing can transform your shots.
Product photography and making things look nice online are like two best friends. Raw pictures of stuff often have problems like bad lighting or ugly shadows. Or the color looks all wrong. The background may be messy. Stuff like that needs fixing. That fixing is a product photography job. It makes the thing look shiny and perfect for people to see.
To take great product photos, you need the right lighting setup. Using artificial lighting with tools like a light tent, foam boards, and a bounce card helps control shadows and reflections. Choose the right focal length to capture clear details. After shooting, edit the product images with editing software like Adobe Photoshop to make them look professional.
Ready to level up your skills? Let’s dive in below and kickstart your product photography journey!
Table of Contents
Why Product Photography is Important
Selling stuff online needs good pictures. Why? Because people can’t touch the thing. They only see pictures. A good picture tells the story. Makes people feel good about buying it. Thinking like senior photos makes people feel confident. Good product pictures make your brand feel convincing, too.
When a picture looks pro, people think your brand is pro. They trust you more. They may buy more things. Also, it helps people understand what the thing is. How big? What color exactly? How does it work? A good picture shows all this clearly. Bad picture? People get confused, and they click away. Good pictures make customers happy and encourage them to come back.
Best product photography tips for beginners
Start simple. Using natural light is the best tip. Like golden hour for portraits. Find a big window. Put your thing near it when the sun is not too strong. Morning or afternoon light is soft and pretty. Don’t use the flash on your phone usually. It makes harsh shadows and bad shine.
For a clean photography setup, a proper studio setup with good studio lighting is important. Using a poster board as a background can help make products stand out. To capture sharp and detailed macro shots, prime lenses work best. For certain angles, portrait mode can also enhance the final image.
1. Understanding your target audience

See what pictures other people selling the same stuff use. What works well? Copy that style a bit. But make yours better. Think about what makes your thing special. Show that in the picture. If it’s soft, show texture close up. If it folds, show it folded and unfolded. Pictures should talk to the right people.
2. Use Natural Light Whenever Possible

Natural light is free and makes things look nice. Like, portraits outside often look best. For product photos, find good window light. A big window is best. Put your product on the table near the window. But not direct sun hitting it. Too bright! Use a thin curtain to soften light if sunny. This makes it soft, even light on the product. No ugly dark shadows.
3. Invest in a Good Tripod

Get a tripod that can go low. Table height is good for product shots. Make sure it is strong enough for your camera. Phone tripods are cheap and work well. Use a timer or remote clicker, too. So you do not touch the camera when taking a picture. Touching makes a tiny shake. Tripod also lets you use a slower shutter speed. More light gets into the camera. Picture brighter without noise. Worth every penny!
4. Choose the Right Background

Picking a good background for product photos is like choosing nice clothes for pictures. Bad backgrounds make your thing look messy. Like wrinkles or ugly colors behind your product. Or distracting stuff. A good background makes your thing shine and look professional.
5. Master Your Camera Settings

Start with easy settings first. Put the camera on “A” mode for control light. ISO keeps low like 100-400. Shutter speed 1/100 or faster. F-stop number? Try f/5.6 to make the product sharp, but the background soft. Practice a little bit every day. Soon, you will no longer need auto mode no more. You are the boss of your camera!
Using a mirrorless camera on a shooting table helps capture sharp product details for your e-commerce website. Adding continuous light with light modifiers improves image quality. High-quality visual content not only looks professional but also boosts your search ranking.
6. Shoot from Multiple Angles

Turn the product slowly. Take a picture every time you turn a little bit. Use a turntable if you have one. No turntable? Put the product on a lazy susan or just turn by hand. Shoot low like an ant’s view. Shoot high like a bird’s view. Shoot eye-level. Each angle tells a new story about your thing. More angles = better for selling!
7. Keep the Focus Sharp

Sharp focus makes the product look really good. Like how props make senior pics interesting. If the focus is blurry, people think the product is broken or cheap. Eyes go straight to fuzzy parts – not good!
8. Use a Lightbox for Consistency

Use a tripod always. Shaky hands make it blurry. Set the camera focus point right on the product. One button press halfway to lock focus. Then full press. If moving? Use “sports” mode. Check the pictures zoomed in. See if the tiny words on the package are readable? If not, reshoot! Sharp pictures make people trust you.
9. Avoid Harsh Shadows

Put light through a white curtain or paper. Makes light gentle. Or bounce light off a white wall. Don’t put light directly on the product. Put a little left or right. Use two lights if you have one. Shadows become soft like a pillow. Check under the product – no dark holes! Fill with white paper if needed.
10. Use Reflectors to Bounce Light

Use crumpled foil on cardboard for a DIY reflector. Or buy a round reflector for $10. Hold the opposite of the light source. Angle it till dark spots disappear. Silver for cool light. Gold for warm light. White for neutral. Bounce light under the chin of the product – no shadow neck! Makes cheap things look expensive.
11. Style the Scene with Props

Adding props makes product photos more fun and real. Like how hats or books make senior pics interesting. But don’t use random things. Pick props that match your product story. If selling a coffee mug, put coffee beans near. Or cookies on a plate. Makes people think “yum!” Place props carefully.
Not too close to the product. Do not block the view. Use simple things like a cloth under the product or a little plant behind. But keep focus on the main thing. Too many props? Messy. Like too much makeup. Just a few good things make photos feel alive and help sell better.
12. Maintain Color Accuracy

True colors are super important in product photos. Like how skin tone looks real in portraits. If a red shirt looks orange? People get mad when products arrive. Color must match the real thing exactly. Use the white balance setting on the camera. Take test shots. Compared to real products with eyes.
If the color is wrong, adjust the camera settings. Shoot in RAW format. Easiest r fix the color later. Bad lighting makes colors lie. Natural light is best for true colors. Or use good studio lights. Check that the screen is not too bright when editing.
13. Use a Macro Lens for Small Products

Tiny things need special lenses. Macro lenses take close-ups super clearly. Like seeing freckles in portraits. Show every detail of jewelry or small electronics. Regular lens? Can’t focus close enough. Blurry mess. Macro lenses let you fill the whole frame with tiny buttons or patterns.
See the texture of fabric or wood grain. Makes small stuff look big and important. You can buy a cheap macro clip-on for a phone camera. Or a real macro lens for a big camera. Worth money to show the quality of little things.
14. Keep the Product Clean and Polished

Dust and fingerprints ruin product photos. Like pimples ruin skin in pictures. Wipe the product with a soft cloth before shooting. Use gloves so as not to leave new fingerprints. Check for scratches or dirt. For shiny things like phones or watches? Use a microfiber cloth. Breathe on it, then wipe it super clean. Turn off the lights, see reflections? Clean smudges you missed. Hairspray can dust away static. Make the product look brand new, perfectly.
15. Shoot in High Resolution

Big files make photos sharp. Like, high-res senior pics look pro. Small files? Pixelated when zoomed. Ugly. Set the camera to the highest quality. Use the “Fine” or “SuperFine” setting. More space on the card, but worth it. High-res, set your crop tight later.
Show small details clearly. Print big if needed. Websites want big pictures, too. They shrink them, butheyeystilll look better, and start big. Don’t use the phone’s “tiny” setting. Always max resolution for best product shots.
16. Capture Close-Up Detail Shots

Show special parts of the product. Like close face shots show eyes. Take photos of the zipper on the bag. Or stitching on shoes. Logo close-up. Button on the gadget. Helps people see quality. Use a macro lens or zoom in. Fill the frame with just one detail. Shoot straight on, not angle. Make the focus perfectly sharp. Take 5-10 detail shots per product. People online want to see everything before buying. Details build trust.
17. Use a White Balance Card

Shoot cards every time the light changes. Cloud covers the sun? Shoot a new card. Move to a different room? New card. Works for video too. Grey cards are good for tricky lights. Keep the card clean always. Dirty cards give the wrong color.
18. Edit Photos Professionally

Editing makes good photos great. Like retouching senior portraits. Fix the little shadows. Make colors pop. Remove dust spots missed. Crop perfect. Don’t use bad free apps. Learn simple pro tools like Lightroom.
For easy graphic design and photo manipulation, tools like Canva Enterprise and Magic Studio offer powerful AI-powered tools. You can use ready-made Canva templates to design eye-catching product labels. A good video editor also helps create engaging visuals for marketing.
19. Maintain Brand Consistency

20. Try Lifestyle Shots

Lifestyle shots make your product feel real and like it belongs in someone’s life. It shows the product being used normally, like a coffee mug on a messy breakfast table or a backpack on a hike. This helps people imagine they own it and use it too. It makes the photo more interesting than just the product alone on a white background. You don’t need fancy models, just show the product doing its job in an everyday scene. Think about where you use the thing and take pictures there. Like a book on a cozy couch with a blanket and reading glasses. It tells a story without words.
21. Use Depth of Field Creatively

Depth of field means some things in the photo are sharp and some are blurry. You use this to make the product stand out from the background. Like, if you take a picture of a toy car, the car is clear, but the stuff behind it is fuzzy. This makes people look only at the car.
It is an easy trick with your camera settings, mostly the aperture. A small f-number (like f/2.8) makes more blur. A big f-number (like f/16) makes everything sharp. For products, a blurry background is usually best.
22. Avoid Overcrowding the Frame

Too much stuff in one picture is confusing. People don’t know where to look. For product photos, keep it simple. Just the product and maybe one or two small things that make sense with it. Like a watch and a coffee cup, not the watch, coffee cup, phone, keys, and a plant all together.
A seamless background is perfect for clean and distraction-free product photos. Using a zoom lens gives flexibility in framing your shot. A light box, along with an LED panel and other lighting equipment, helps achieve consistent lighting. A complete product photography kit is great for beginners. To create engaging images, try a styled shot and focus on shot building to highlight the product effectively.
23. Pay Attention to Reflections

Shiny products like phones or jewelry make reflections. Sometimes reflections are good, they show the shine. Sometimes they are bad, they show your hand or the camera, or an ugly ceiling. You gotta look carefully at the product when you set up. See if you see yourself or a window in it. If you see something bad, you need to move the lights or move the product. Or you can use a special tent for small shiny things to control reflections. It is annoying but important.
24. Follow the Rule of Thirds

The Rule of Thirds helps make photos look balanced and nice. Imagine your picture has a grid: two lines across and two lines down, making nine boxes. The points where the lines cross are good spots to put the important things, like your product.
Don’t just put the product dead center all the time. Try putting it a little to the left or right, or up or d, down on one of those crossing points. This makes the picture more interesting for people’s eyes to look at.
25. Test and Tweak Continuously

Don’t just take one picture and think it’s done. Take lots! Change little things each time. Move the light. Move the product. Change the camera angle. Try a different background. Take a picture, look at it on the camera screen, see what you like or don’t like, then change something and take another. Testing means trying different ways. Tweaking means making small adjustments. This is how you learn what works best for that product and your setup. Your first shot is rarely your best shot.
FAQs
- What camera is best for beginner product photography in 2025?
A mirrorless or DSLR camera with manual settings, like the Canon EOS R50 or Sony ZV-E10, is ideal for beginners.
- Do I need a lightbox for product photography?
A lightbox helps create consistent lighting and clean backgrounds—highly recommended for small to medium products.
- Can I use a smartphone for product photography?
Yes! Modern smartphones like the iPhone 15 or Google Pixel 8 Pro can produce excellent results with proper lighting and angles.
- What’s the most important tip for beginners?
Master lighting first; natural or artificial light dramatically affects how professional your product photos look.
Final Thought
Want Studio-Quality Product Photos Without the Studio? Let Cutout Image Media enhance your shots with expert background removal and retouching. Start Now at Cutout Image Media!