Use photo x-ray clothes online. Apply X-ray in Photoshop. Use see-through clothes filters. Apply the Photoshop X-Ray Effect. Use the X-ray effect in Photoshop. Apply the Photoshop x-ray effect to clothes. Learn how to X-ray photos.
People learn to see through clothes in Photoshop. This skill excites users. It changes the appearance of clothes. It makes clothes partly invisible. This trick creates magic photos. Users feel like wizards. Watching others inspires users. This skill remains fun. Steps remain simple to follow.
This guide tells you everything for making clothes see-through in Photoshop for 2025. We got all the steps you need. We tell you how to pick the right tools and settings to use.
Let’s dive below!
Table of Contents
What is an X-ray Photo in Photoshop?
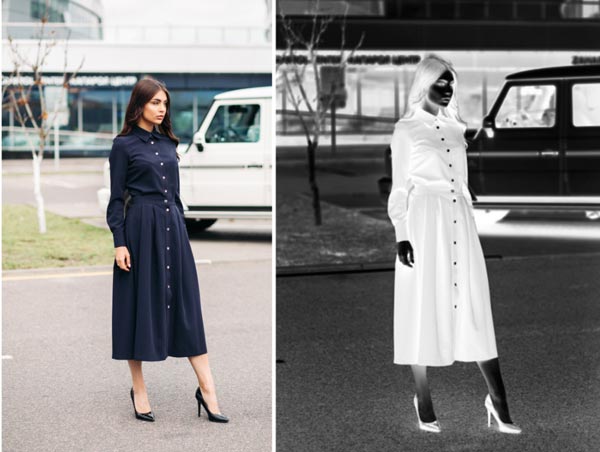
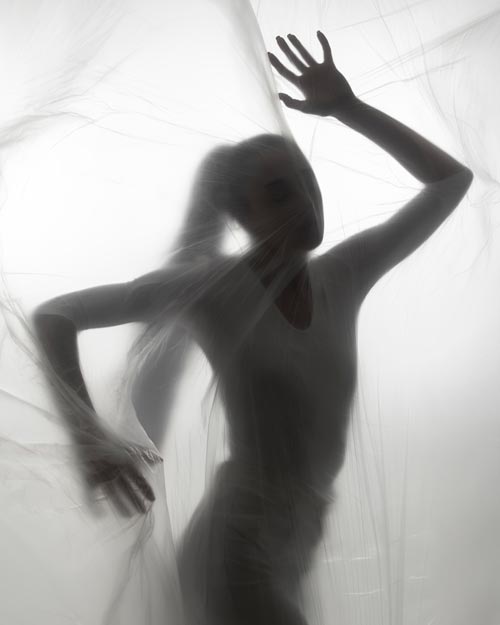
An X-ray photo in Photoshop is not a real X-ray like a doctor’s. It is a picture effect making things look see-through, like bones under skin. It shows what might be under the clothes or skin. People think it looks cool and futuristic. It is a pretend thing for art, not for real medicine. Social media sometimes has these fake X-ray pictures. They get lots of likes and shares.
Photoshop X-ray shows hidden parts. The X-ray technique makes an effect. The X-ray process changes the photo. Transparency effects create a view. Special effects enhance the image. Fabric transparency shows detail. Image editing techniques make results.
But making a good fake X-ray picture needs skills. It is harder than just making clothes a little transparent. You must understand light and shadows well. Also, how things look under other things. Using just a phone app won’t make it look proper.
Professionals use Photoshop with special tools and layers. They know how to draw the fake bones or shapes under. This makes the picture believable. Free apps cannot do this good. Only Photoshop, with a skilled person, makes the best pretend X-ray pictures for fun.
An X-ray picture is the best way to show something hidden. Whether you are a pro or not, the sliders, brushes, and filters will make you feel like a doctor and be creative. Usu, people X-ray pictures at the hospital for their bones. So naturally, you have already seen what it looks like.
Garments with layers create depth. Semi-transparent clothing shows the effect. Infrared light reveals detail.
Don’t have any X-ray pictures? No problem. Making an X-ray in Photoshop will be your fun project and bring you back to the computer every time you see it. You can use the layer mask on the clothes part and let the brush tool do the work. Using the eraser or blur tool on the edges will make cool pictures as well.
Why Use X-Ray Photoshop Online?
Photo editing software changes images. A single tool helps users. 3D effects improve photos. Editing games attracts players. Security check protects data.
You should try professional X-Ray Photoshop online to increase your creativity as a young adult. Now, questions like how Photoshop can be connected to building creativity may come into your mind.
X-ray image editing changes the photo. Image editing technique creates an effect. Simple steps guide the process. The step-by-step guide gives directions. Adobe Photoshop does work.
The tutorials and guides from the websites can help you learn cool picture tricks in front of the computer. This way, you can feel happier with your digital art. Besides, the effort you put into making see-through clothes with a conscious mind makes you prepared to present your skills in the online world, where digital presentation is crucial. Most importantly, these edited pictures will hold fun value and become more amazing over the years.
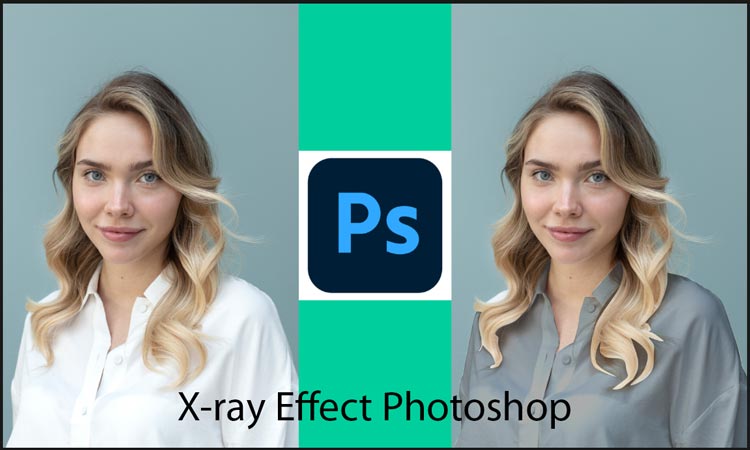
X-ray Photoshop online makes fake X-ray pictures easy. It shows “bones” under clothes like a doctor’s X-ray, but not real. People think it’s cool for jokes or art projects. You just pick a filter and see instant results. No skills needed. Good for people who want to try X-ray effects fast without learning hard Photoshop steps.
Path services create cutouts. Ghost mannequin services show shape. Clipping Path Zone edits images. Ghost mannequin photography displays products. Trial tests quality. Professional service ensures results.
But the real X-ray effect needs pro skills. Online tools only give a basic, fake look. The “bones” it adds look cartoonish and not real. Shadows and lights don’t match properly. If you want believable X-ray art, Photoshop with hand editing is the only way. Online x-ray just for silly fun, not for serious pictures.
How To Make See Through Clothes In Photoshop?
Making clothes see-through in Photoshop makes you feel clever. It is a fun trick to learn. First, you pick a picture where the clothes are clear to see. Then you tell Photoshop which bit of the clothes you want to change. This is the start. It helps you show your creative side. Maybe you feel shy at first, but then happy when it works.
Technique makes results. The method gives way. Process creates outcome. Adjustments change photos. Editing skill improves quality. Editing the game show’s level.
The photographer person (or you!) says nice things while you work. This helps you not be nervous. You tried hard to make the see-through part look really good. This focus makes you better at using Photoshop tools.
Learning this helps you later for other art or design jobs, maybe. Most importantly, the picture you make will be a special memory. You look at it later and remember learning this cool Photoshop trick in 2025. It becomes more special as time goes by.
Are you a creative person? Try out the see-through clothes effect in Photoshop to make cool digital art. Pictures edited in Photoshop on your computer will bring back memories of learning fun new skills on the software.
Use Photoshop to X-ray clothes. Apply X-ray Photoshop. Use the Photoshop x-ray effect on clothes. See-through cloth shows hidden details. Photoshop X-ray technique makes edits.
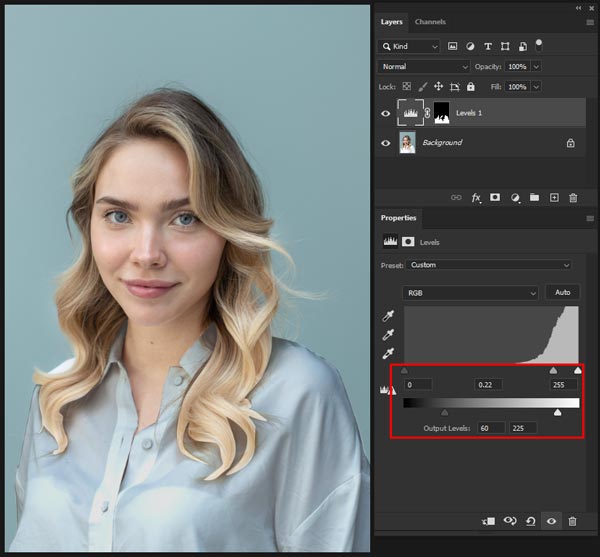
Light-colored clothing creates an effect. The background layer supports design. Layer 1 holds edit. Path Panel manages shapes. Path 1 defines the area. Refined edge brush smooths the border. Transparency color adjusts the view. Exact fit ensures alignment. Keyboard shortcut speeds work.
The see-through clothes effect looks best when you use the layer masks tool or select the dress parts. Clicking on the opacity slider or brush that you need to learn for this will make amazing pictures. You can also change the background of your picture or the dress color by editing the layers on the screen.
Step 1: Open Your Image in Photoshop
The first thing you do is open your picture in Photoshop. Find the picture file on your computer. Maybe it is in the ‘Pictures’ folder or on your desktop. Click on the file name to choose it.
Then you click ‘File’ at the top left. Then click ‘Open’. Your picture pops up on the big screen now. It is ready for you to start changing. It feels exciting seeing your picture big like that.
Ctrl+O opens the file. Adobe Photoshop edits photos. Image editing software makes changes. The model shows a pose. Photography captures moments.
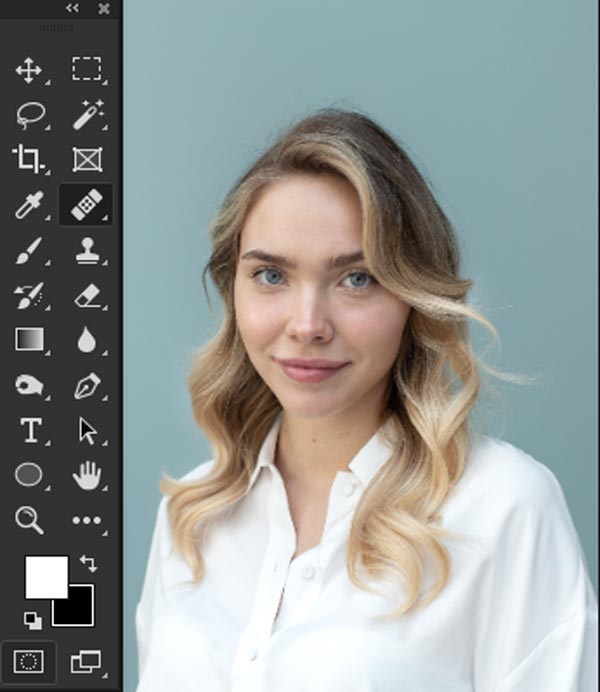
Make sure the picture is good for making clothes see-through. The clothes part must be easy to see, not blurry or too dark. A clear picture works best. If the person is moving fast in the picture, it might be hard. Choose a picture where they stand still. This makes Step 2 easier later. Think about the light in the picture, too. Good light helps Photoshop work better. Now your picture is open! You are ready for the next step.
Selecting an image

Picking the right picture is very, very important. You cannot use any picture. Find one where the person wears clothes that are not too busy. A plain shirt is good.
A shirt with big pictures or words is bad for this. Also, the color of the clothes matters. Some colors, like black or white, are sometimes easier than bright red or green. Look at the background too. If the background is messy, it makes it hard to select just the clothes.
Subjects create focus. Elements build composition. Dress shows style. Garments cover the body. Cloth makes fabric.
Think about what is under the clothes in the picture. You need to see a little bit, maybe for the effect. Like skin color or another layer. If the clothes are a thick winter coat, it won’t look real when seen through. A thin t-shirt is better. Also, the person poses. If they stand straight, it is good. If they twist, the clothes might stretch weirdly. Pick a picture you like. One that makes you happy. Then you enjoy the work more. A good pick means a good see-through effect later.
Step 2: Select the Clothes Area to Make Transparent
Now you must tell Photoshop which clothes bit you want to see through. Use the Lasso tool or maybe the Pen tool. Find them on the left side tools. Click and hold the mouse button. Draw around the clothes part carefully. Go slow. If you go too fast, you might pick the wrong bits, like skin or background. Try to follow the edge of the clothes closely. This is called making a ‘selection’. A moving dotted line shows where you selected.
Make Selection defines the area. Accurate lasso tool use makes precision. Select and Mask refines edges. The clothes selection step isolates the dress. Masks control visibility. Layer masks hide parts. Clipping path creates a cutout.
If you make a mistake, press ‘Ctrl+Z’ on the keyboard to undo. Try again. Getting this selection right is super important. If the selection is messy, the see-through part looks bad. Zoom in close to see better. Use the little plus magnifier glass tool. Click on the clothes area to see it bigger. This helps you draw the selection line very exactly. Take your time. Don’t rush. A good selection makes the next step easy, and the final picture looks pro.
Step 3: Duplicate the Selected Clothing
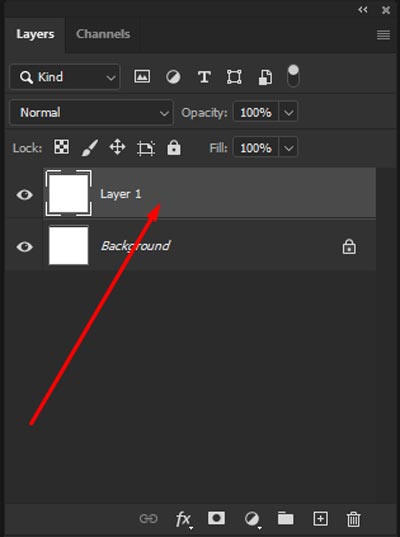
After you get the clothes selected, you need to make a copy. Right-click inside the moving dotted lines. A little menu pops up. Choose ‘Layer via Copy’. Or press ‘Ctrl+J’ on the keyboard. This makes a new layer just with the clothes part. You see it in the Layers panel, usually on the right side. It sits on top of the original picture layer. Like a sticker.
Duplicate layer copies work. The dress layer shows the outfit. Additional layers add depth. Separate clothing divides. Pieces of clothing show parts. The image layer holds the photo.
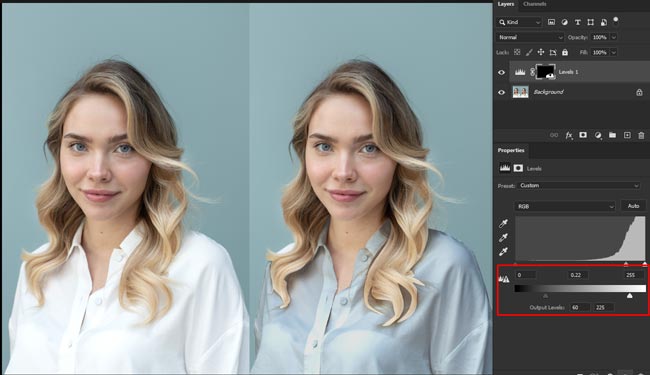
Now comes the magic part. With this new clothes layer picked, find the ‘Opacity’ slider. It is in the Layers panel too. Slide it to the left to make a lower number. Maybe start at 50%. Watch! The clothes are see-through now.
You can see the skin or whatever is under it in the picture below. Adjust the slider more until it looks right to you. Not too see-through, not too solid. Maybe add a little blur filter sometimes to make it softer. Then you save your work. Done! You made the clothes see-through.
Step 4: Apply Transparency to the Clothing
Making clothes see-through in Photoshop makes you feel like a magician. This step is where the magic happens for real. You take the clothes part you selected and make it partly invisible. This shows what is under like skin or other clothes. It is exciting to see the change happen right on your screen. Your friends might have done this before, and now you can do it too!
Blending modes change appearance. Blend If sliders adjust tones. The Layer Style menu applies the effect. Transparency effects show layers. Fabric transparency reveals details. RGB controls color.
Opacity Adjustment
You use the opacity slider to control how see-through the clothes look. Slide it left to make the number smaller, like 30% or 40%. If you slide too much, it looks weird and fake. Not enough sliding makes the effect too weak. Practice makes perfect.
Try different numbers until it looks natural. Remember, good lighting in the original picture helps the see-through part look more real. If the lights were bad, the effect might look messy.
Step 5: Finalize Your Edited Image
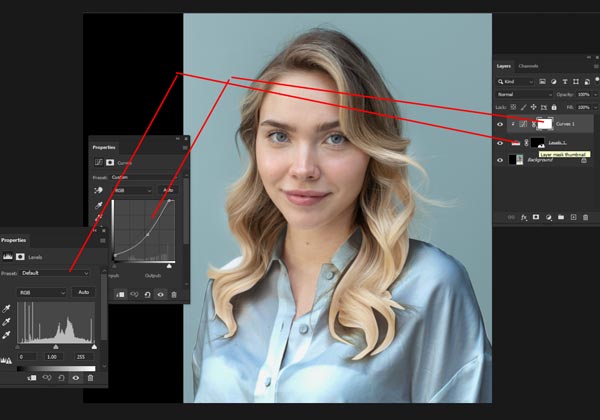
Now your picture is almost done! Final touches make it look professional. You need to check if the edges of the see-through clothes look smooth. If the edges are rough, use the blur tool a little bit. Just soft touches around the clothes part. Also, look at colors. Sometimes the skin under clothes needs a color fix to match the rest of the body. Use the color balance tool for this.
Brightness improves light. Adjustments fix photos. Editing styles create mood. Final touch completes work. Stunning photographs attract viewers.
Add a background effect if you want. Maybe make the background blurry so the see-through clothes stand out more. Save your work as PSD first so you can change it later.
Then saves as JPEG for sharing. Look at your finished picture proudly. You made something amazing! Show it to friends carefully, though. Not everyone understands this art.
Advantages of Online Tools
Online tools for seeing-through effects are quick and easy. You don’t need to download big Photoshop. Just open the website and upload a picture. It takes a few seconds to make an effect. Good for people who are beginners or in a hurry. Many people like the fast results for fun social media posts.
Online editors provide tools. GIMP offers features. Ability improves skill. Capability handles tasks. Utilization maximizes output. Professional service delivers quality.
Also, tips for making it look real and not fake. Making the clothes transparent is easy with our help. You don’t need to be scared to try. We make it simple so you can take good pictures too, like a pro. Just follow our words carefully.
But these tools do not always work well. They use simple AI that often makes mistakes. Clothes might look patchy, or the skin color might be wrong. The effect does not look real like Photoshop does. Plus, you cannot control details like the opacity level. What you get is what you see. For serious work, better use Photoshop. Online tools are just for quick fun when quality does not matter much.
Can ChatGPT Remove Clothes or Generate Nude Images?
ChatGPT cannot remove clothes or make nude pictures. Some people think AI can do this, but it is not true. ChatGPT helps with ideas or text, not with images. Making nude pictures without permission is wrong and illegal.
For the see-through clothes effect, always use Photoshop with real photos you own. Never edit other people’s pictures without asking. This protects privacy and keeps you safe. Photoshop tools are for creative art, not bad things.
FAQs
How to use Photoshop to see through clothes?
The best way to Photoshop see-through clothes is to use the X-ray technique or transparency effects. First, you need to select the clothing area. After that, you are required to use tools like Lasso or Select and Mask. Once you duplicate the clothing layer, apply layer masks and use blending modes to create the see-through effect.
How to unblur an image in Photoshop 2025?
You need to use the Sharpen tool or the Smart Sharpen filter available in Photoshop. After that, you need to apply the adjustments precisely so that no noise is left. Once the process is done, use the camera raw filter to give the final clarity.
How to generate an image in Photoshop 2025?
You can now use AI-powered image generation features, for example, Photoshop’s Generative Fill. At first, open your image, select the area needed to modify, and type your prompt. Photoshop will automatically create new content based on your instructions.
How to make a see-through in Photoshop?
First, you need to select the object or clothing area. After that, just duplicate the layer and apply transparency effects using a layer mask and blending modes. Finally, adjust opacity and refine edges to achieve the final realistic see-through results.
Final Word
Meaning shows purpose. A message conveys ideas. Nature inspires the mind. The mind creates thought. Artistic images display creativity. Fun images entertain viewers.
Visit Cutout Image Media and learn how to make see-through clothes in 2025 with simple, step-by-step techniques. Start editing like a pro now!