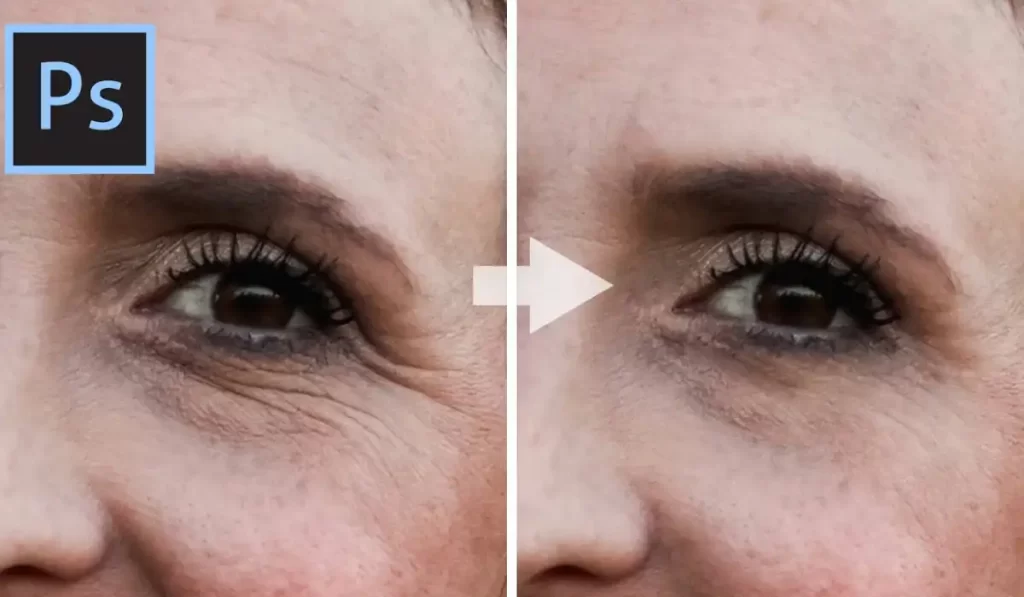
Are you tense about how to smooth wrinkles in photoshop?
Anyone who wants to improve their picture photos needs to learn how to smooth out wrinkles in Photoshop. This process not only makes the subject look better, but it also makes your work look more professional.
Table of Contents
Remove Wrinkles Photoshop
Reduce wrinkles photoshop is a strong way to edit photos that gets rid of unwanted wrinkles in pictures and product photos while keeping the subject’s natural texture and look. To get a smooth wrinkles in photoshop, a perfect look, it is often used in fashion photography, professional pictures and product photos. With the right tools and methods, this process makes sure that the people being photographed look their best while still capturing skin details.
Why is Wrinkle Removal Important?
- Enhances professional appearance: Clean, smooth skin boosts a person’s or product’s look.
- Preserves natural beauty: Skilled editing maintains realism, avoiding the “plastic” look.
- Improves brand image: Perfect image means quality and professionalism.
- Boosts customer satisfaction: Qualityful professional photoshop smooth wrinkles removes meet client expectations.
- Maximize audience engagement: Attractive images increases interaction and conversion.
Cutout picture Media is great at providing fast and accurate high-quality picture editing services. Their experience in services like,
- Background removal,
- Picture blurring, and
- Shadow creation and many more.
Cutout Image Media is a reliable partner for shooters, e-commerce companies and creative industries because they focus on skill and attention to detail. They help brands show off their goods perfectly and get more people to interact with them.
Tools Used for Wrinkle Removal in Photoshop
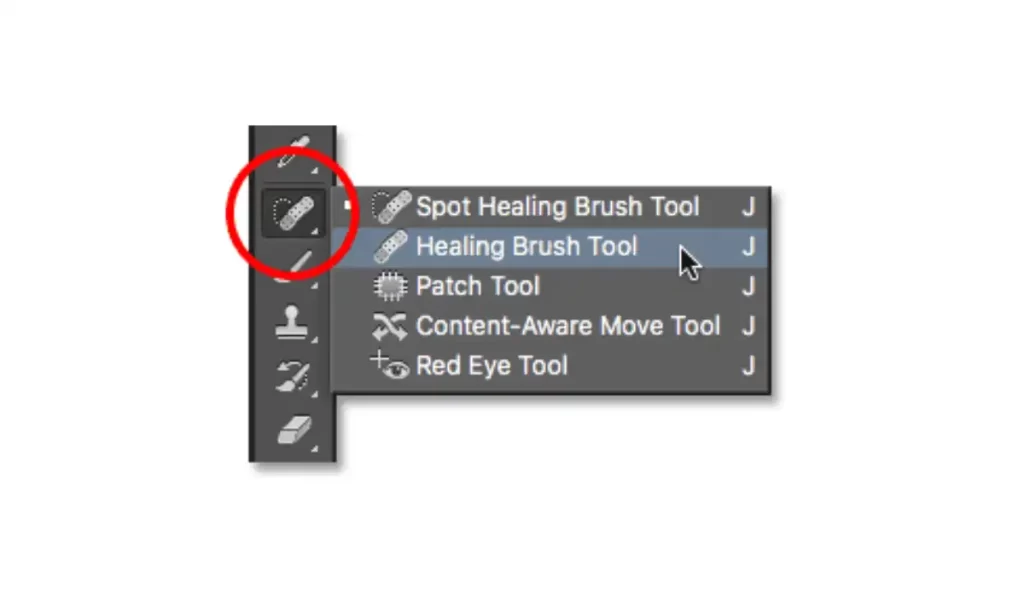
- Healing Brush Tool: Blends and repairs wrinkles with surrounding textures.
- Spot Healing Brush Tool: Quick fixes for small wrinkles and blemishes.
- Clone Stamp Tool: Replaces wrinkles by clean areas of the image.
- Frequency Separation Technique: Separates texture and color for editing.
- Dodge and Burn Tool: Adjusts light and shadows for better smoothness.
Comparison of Photoshop Tools for Wrinkle Removal
| Tool | Best For | Usage Difficulty | Effectiveness |
| Healing Brush Tool | Small wrinkles & textures | Easy | High |
| Spot Healing Brush Tool | Tiny blemishes | Very Easy | Moderate |
| Clone Stamp Tool | Larger wrinkles | Moderate | High |
| Frequency Separation | Professional edits | Difficult | Very High |
| Dodge & Burn Tool | Light shadow adjustments | Moderate | Moderate |
How to Remove Wrinkles in Photoshop: Step-by-Step
Step 1: Open Your Image
- Launch Photoshop and load the image you want to edit.
- Press Ctrl + O (Windows) or Cmd + O (Mac) to open the image.
Step 2: Duplicate the Layer
- Right-click on the background layer and select Duplicate Layer.
- This make sure you can edit without affecting the original image.
Step 3: Select the Healing Brush Tool
- From the toolbar, select the Healing Brush Tool.
- Adjust the brush size to match the wrinkle area.
Step 4: Set a Sample Point
- Hold Alt (Windows) or Option (Mac) and click on an area near the wrinkle.
- This creates a sample point with matching skin texture.
Step 5: Paint Over the Wrinkles
- Slowly paint over the wrinkles, blending them with the sampled texture.
- Use short strokes for better control.
Layer Settings for Smooth Wrinkle Removal
| Layer Setting | Function | Recommended Value |
| Opacity | Controls intensity of effect | 50-70% |
| Blend Mode | Blends edited areas smoothly | Normal or Lighten |
| Gaussian Blur (if needed) | Softens sharp edges | 3-5 pixels |
| Frequency Separation | Separates texture and tone | Custom Values |
Step 6: Use Frequency Separation for Advanced Edits
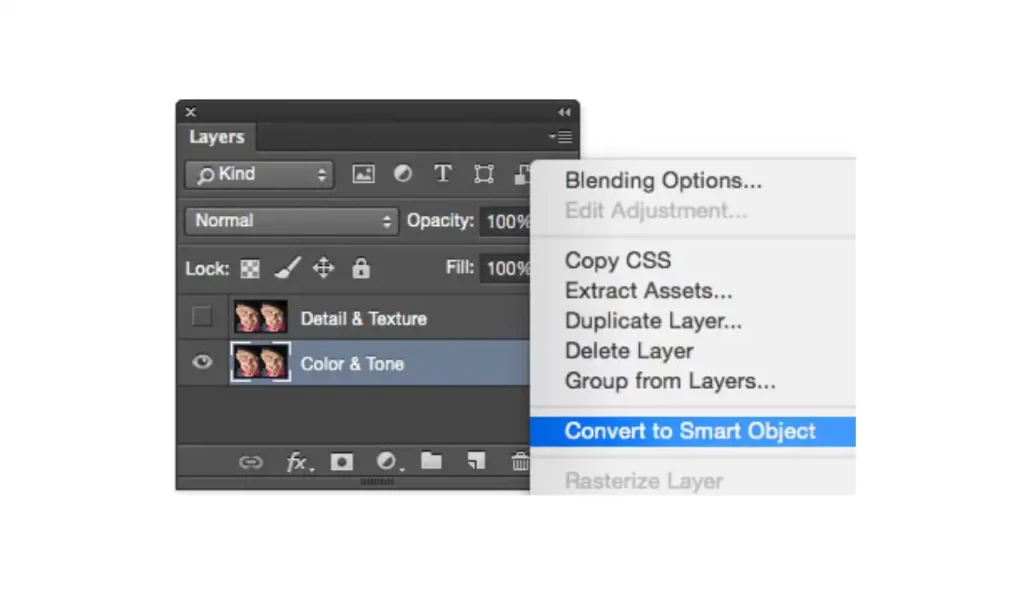
- Make two copies of the picture, one for background and one for color.
- To get rid of wrinkles, use a Gaussian Blur on the bottom layer.
- For precise painting, use the Clone Stamp Tool to cover up the wrinkles on the top layer.
Step 7: Adjust Opacity and Blend Modes
- To get natural results, fine-tune the effect by making the layer less opaque.
- To slightly improve the skin tone, use blend settings like “Lighten.”
Step 8: Final Touches with Dodge & Burn
- To make dark spots from wrinkles lighter, use the Dodge Tool.
- You can make things look more real by adding depth with the Burn Tool.
Step 9: Save Your Edited Image
- Go to File > Save As to save your work in formats like JPEG or PNG.
- For future edits, save a PSD file with layers intact.
When to Use Wrinkle Removal in Photoshop?
- Professional Headshots: Make business photos look better while still being professional.
- Make sure the bride and groom look their best on their wedding day.
- Fashion shoots: Show off models in the best light possible.
- Product photography: Get rid of wrinkles in clothes or accessories.
Benefits of Wrinkle Removal in Photoshop
- Natural Look: If you know how to use the tools well, the changes won’t look fake.
- Quick changes with Spot Healing cut down on the time it takes to edit.
- High Precision: Frequency Separation lets you make small changes to photos.
- Professional Results: This style works well for ads and galleries.
- Uses Many Things: It can be used on skin, clothes, and things.
Getting rid of wrinkles in Photoshop is a skill that everyone who wants to make perfect, professional photos needs to have. This method makes sure that every detail is just right in everything from portraits to product ads. You can get rid of even the most complicated wrinkles in a picture without changing its natural look by using the,
- Healing Brush Tool,
- Frequency Separation and
- Dodge and Burn together.
The end result looks smooth, clean and real if you control the layers and mix them correctly. If you’re a photographer, artist or business owner, learning how to get rid of wrinkles will help you show off your best work, make clients happy and build trust through great photos.
Remove Clothing Wrinkles Photoshop
Getting rid of wrinkles in clothes in Photoshop makes sure that the pictures look clean and professional, with clothes that are smooth and well-presented. Clothes that don’t wrinkle are important for fashion photography, product photos and online shopping, where the focus needs to be on a perfect look. Here is a quick guide on how to use Photoshop to get rid of wrinkles in clothes.
Photo Retouching Service is very important for improving the quality of pictures because it fixes flaws and brings out details for a more professional look. It involves changing the colors, making the skin smooth, getting rid of flaws, improving the lighting and sharpening the whole picture to make each photo stand out. Expert editing can make regular photos look better for e-commerce, fashion, weddings or personal pictures.
Step-by-Step Guide to Remove Clothing Wrinkles
Open the Image
- Load your image in Photoshop using Ctrl + O (Windows) or Cmd + O (Mac).
- Create a duplicate layer to protect the original image.
Select the Healing Brush Tool
- Press the J key to bring up the Healing Brush Tool.
- To get a sample, hold down Alt or Option and click on a smooth part of the fabric.
- If you brush over wrinkles, the material will fit in smoothly with the area that was sampled.
Use the Clone Stamp Tool for Larger Wrinkles
- Select the Clone Stamp Tool (shortcut: S).
- Choose a piece of fabric that is smooth and paint over the wrinkles that are deeper.
- Change the brightness to keep the original look.
Apply the Dodge & Burn Tools for Depth Adjustment
- To get rid of shadows caused by wrinkles, use the Dodge Tool.
- To make the lighting more consistent, use the Burn Tool to darken the highlights.
Use Frequency Separation for Precise Control
- Make two layers of the image: one with high frequency (texture) and one with low frequency (color).
- You can edit each layer separately to get better control over wrinkles without changing the structure as a whole.
Smooth Out with Gaussian Blur (Optional)
Use a Gaussian Blur filter on the low-frequency layer to get rid of small wrinkles.
There are many useful tools in Photoshop, such as the Healing Brush, the Clone Stamp, and Dodge & Burn, for quickly getting rid of wrinkles in clothes. Using frequency splitting gives you exact control, which keeps the feel of the cloth the same while getting rid of wrinkles. These methods make sure that the clothes always look clean and put-together, no matter what.
Lost Wrinkles Photoshop Color Change
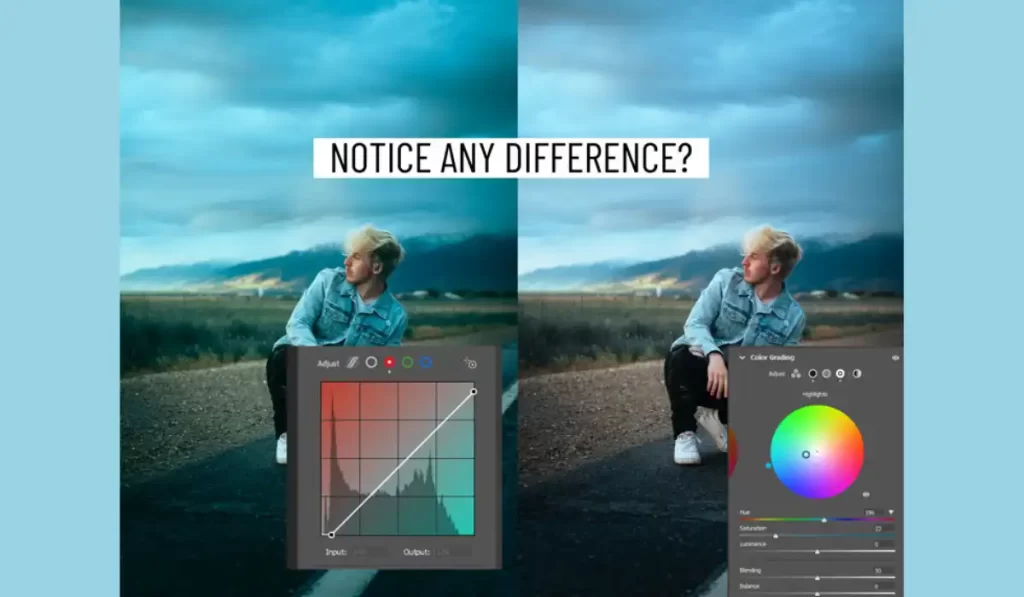
No More Wrinkles When you use Photoshop Color Change, you can change or improve an image’s colors while also getting rid of wrinkles to keep it looking clean and professional. This method makes sure that the end picture has bright, well-balanced colors and is perfect to look at. It’s an important skill for professional photographers to have for headshots, product shots, fashion shoots and more.
Why Use Color Change and Wrinkle Removal Together?
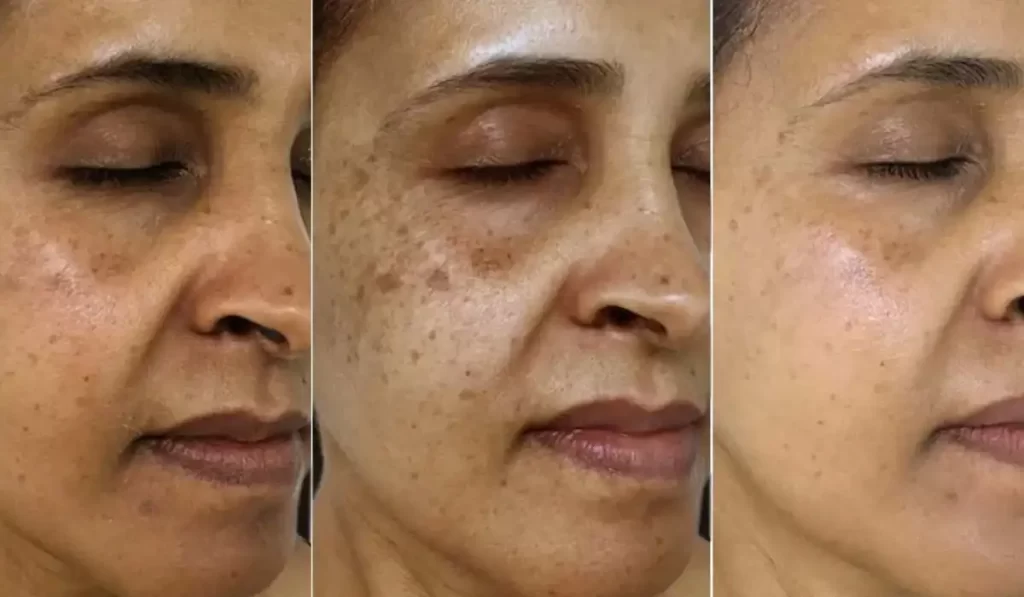
- Consistent Skin Tone: Fixing colors makes sure that skin tones are smooth and even.
- Better visual appeal: Images that are interesting to look at have bright colors and smooth skin.
- Expert Look: Both changes work together to make output that looks like it belongs in a magazine.
- Perfect Product Photos: Colors that are right and surfaces that are smooth make products look better.
- Balanced Lighting: Fixing tones makes sure that pictures look bright and even.
- Workflow that saves time: Doing both steps at once saves the most time when updating.
Tools Needed for Wrinkle Removal and Color Change in Photoshop
- To get rid of lines and even out skin tone, use the Healing Brush Tool.
- The Color Balance Tool lets you change the highlights, shadows and midtones.
- The Selective Color Tool lets you make exact changes to the colors of certain places.
- Clone Stamp Tool: Fixes bigger flaws and surfaces.
- The Dodge and Burn Tool evens out light areas for a smooth finish.
Step-by-Step Process for Lost Wrinkles Photoshop Color Change
Step 1: Open Your Image
- Load your image in Photoshop.
- Press Ctrl + O (Windows) or Cmd + O (Mac).
Step 2: Duplicate the Layer
- Create a duplicate of your image layer to preserve the original.
Step 3: Remove Wrinkles Using Healing Brush Tool
- Pick out the Healing Brush Tool and make the brush the right size for the lines.
- Hold down Alt or Option and click over wrinkles to see a sample of clean skin.
Comparison of Color Correction Techniques
| Tool | Purpose | Best For |
| Color Balance | Adjusts overall color tones | Portrait and product images |
| Selective Color | Precise color modifications | Fashion or product photos |
| Hue/Saturation | Enhances specific colors | Boosting vibrancy in images |
| Levels Adjustment | Balances shadows and light | All types of photography |
Step 4: Adjust Skin Tone Using Color Balance
- Open the Color Balance Tool via Image > Adjustments > Color Balance.
- Adjust shadows, midtones, and highlights to maintain even tones.
Step 5: Fine-Tune Colors with Selective Color
- Use Selective Color Tool to enhance specific tones, such as clothing or background colors.
Step 6: Dodge & Burn for Smooth Finish
- To make dark spots lighter, use the Dodge Tool.
- To make shadows look more real, use the Burn Tool.
Layer Settings for Wrinkle and Color Editing
| Layer Setting | Function | Recommended Value |
| Opacity | Controls effect intensity | 50-70% |
| Blend Mode | Smoothens skin and colors | Normal or Lighten |
| Frequency Separation | Separates texture and tone | Custom values |
Step 7: Save Your Work
- Go to File > Save As and export your image as JPEG, PNG, or PSD.
- For further editing, save the layered file as PSD.
Wrinkles The Photoshop Color Change method is the best way to get rid of wrinkles and improve colors at the same time to make pictures look bright and professional. Putting these changes together makes sure that every detail is perfect, whether you’re working on headshots or product photos.
Photoshop has tools like the Healing Brush, Selective Color and Dodge & Burn that help keep the skin’s natural texture and improve color tones. You will always get professional results that look great with this smooth mix of fixes.
At The End
To sum up, learning how to smooth wrinkles in photoshop can make you a much better picture editor and make your images look better. It’s possible to get beautiful effects with tools like,
- Frequency separation,
- The Healing Brush and
- The Gaussian Blur filter.
When learning how to get rid of wrinkles in Photoshop, remember that practice makes perfect, so don’t be afraid to try out different approaches. Finally, learning how to get rid of wrinkles in Photoshop will help you become a better editor and let you make perfect, professional photos.
FAQs
What is the best tool in Photoshop for smoothing wrinkles?
The Healing Brush Tool is the best Photoshop tool for getting rid of wrinkles. With this tool, you can mix the area you’re retouching with the texture of the skin around it, making it look more realistic. The Clone Stamp Tool can also be useful, especially for covering bigger areas, since it takes pixels from one part of the picture to hide flaws.
How can I smooth wrinkles without losing skin texture?
Use the Frequency Separation method to get rid of wrinkles without changing the structure of your face. With this method, the image’s color and structure are separated. This lets you smooth out wrinkles on the low-frequency layer while keeping features on the high-frequency layer. You can get a healthy look that keeps the subject’s original skin texture by making small changes.
What settings should I use for the Healing Brush Tool to remove wrinkles?
To get rid of wrinkles with the Healing Brush Tool, make sure the brush size is a good fit for the place you want to fix. Change the hardness to between 0 and 20% for a softer blend, and choose a low density of about 50% to let you apply it slowly. To make sure the blending goes smoothly, pick a starting point that has a similar tone and structure.
Can I adjust the intensity of wrinkle smoothing in Photoshop?
Changing the brightness of the layer you are working on in Photoshop will let you change how much wrinkle smoothing you do. If you lower the density, the effect will be less strong and some of the original skin pattern will show through. You can also use editing layers or the Gaussian Blur filter on a different layer to have more control over the effect of smoothing.

