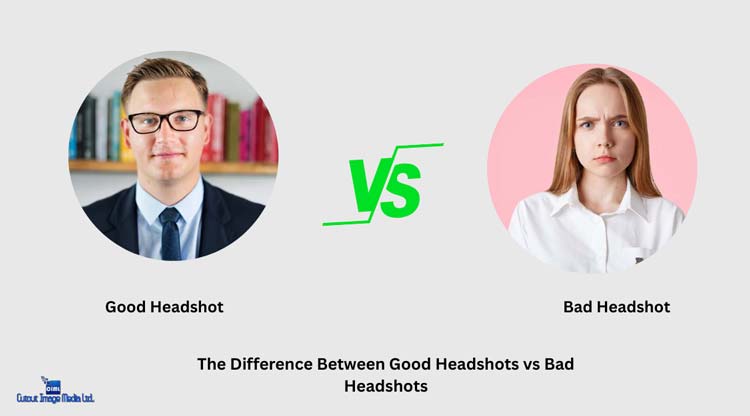
Headshots are depicted as business cards in the professional world. These professional photographs (headshots) are captured not just to show your face but your entire story. That’s why a headshot shows who you are, what you do, and what your personality traits are. Moreover, these photos are necessary tools to show your first impression and do the work of personal branding. But, the real concern is not how to click them but how to edit a photo for a headshot.
The brilliant news is that you don’t need to be a skillful headshot editor. My easy and simple headshot tips for professional photojournalism editing will be enough for you. Let’s follow in the footsteps of this guide: How to edit a photo for a headshot.
It’s time to get creative.!
Table of Contents
How to Edit Headshots in Photoshop?
Corporate professionals, creative people, job seekers, skillful photographers, and everyone else need great headshots at some point in life. The initial stages, like professional lighting, composing, photo shooting, and creating a connection with the person who’s right there in front of your camera, are not a big deal. The concern begins when you don’t know how to edit a headshot professionally in the post-production stage. However, you don’t need to stress about it now as I have some amazing headshot tips up in the sleeves.
When it comes to editing headshots, you will definitely need to get your hands on a powerful editing app that allows for precise control. For this purpose, you can look for software that offers local adjustments, like brushes and masks. These edits really make your subject pop. Top-notch options like Adobe Photoshop and Lightroom, ON1 Photo Raw, and Capture One all offer similar tools. Their names are just different.
So…don’t worry too much about the terminology – just pick the one that feels most intuitive to you and start editing your headshots. Just read the following professional headshot tips about how to edit headshots in Photoshop and any other AI tool. In the end, you will become a pro in editing your headshots easily and instantly.
Top 10 Professional Headshot Tips:
The following steps or headshot tips will show you how to edit a photo for a headshot with AI or any other tool like Photoshop, Lightroom, etc.
1. Lens and Composition Correction for Professional-Grade Headshots:
The lens you use can make or break the look of your headshots. Let’s take an example of wide-angle lenses here. They can make facial features appear warped and distorted. On the flip side, telephoto lenses can compress the perspective. This lens makes your subject’s face look flat.
And then there is the issue of vignetting – where the corners of the image darken. Meanwhile, it draws attention away from your subject’s face. So…it is essential to apply lens corrections to your headshots to avoid these aches. This simple step can make a huge difference in the overall look and feel of your headshot image.
Just correct for lens distortions and vignetting and you will ensure that your headshots appear clean, balanced, and polished. For this, take the time to apply your lens settings and watch your headshots transform into stunning and professional-grade portraits. I can guarantee you they will showcase the best features of your subject. It’s a small step that can make a big impact on the final result.
Let’s get started with lens corrections in Lightroom. For this purpose, navigate to the Lens Corrections tab and select the Profile option. From there, toggle on the Enable Profile Corrections switch. Lightroom will then attempt to automatically detect and match the lens profile.
If it is unable to find the correct profile, don’t worry. You can simply use the Make dropdown menu to search for your specific lens. This guarantees that you are using the most accurate lens profile. This is essential for making precise corrections and achieving the perfect results.
2. Do The Basic Adjustments to Exposure and White Balance:
Let’s start perfecting the basics before getting into advanced headshot editing techniques. You can start by fine-tuning the exposure and white balance in your headshot. It is rare to nail these settings perfectly in-camera, especially when shooting in tricky lighting conditions like harsh sunlight. So, making these basic adjustments will lay the foundation for a polished final product (headshot in this case).
It even doesn’t matter if you are working with a studio-lit or DIY headshot. More importantly, you will set yourself up for success when it comes to color grading and skin editing after getting the exposure and white balance just right. After all, these basic adjustments will give a natural and flattering look to your subject.
Let’s take a look at the example photo given below. It illustrates a headshot that is slightly underexposed. Hmmm…you can see that the photographer was working with intense sunlight. This led to a deliberate underexposure to preserve the highlights.
Let’s see what’s the editing process of basic Lightroom adjustments for the above-mentioned headshot. See the steps below:
- First of all, I added a touch of warmth to the given image by nudging the Temperature slider toward the yellows. This step gives the overall tone a cozy feel.
- Next, I boosted the Exposure to brighten up the image and bring out the features of the subject.
- Then, I dialed down the Highlights to prevent the white background and furry jacket from becoming blown out.
- Also, I reduced the Shadows and Blacks to add depth and vibrancy to the skin tones. This step makes the subject look more radiant and alive.
You can also make these basic adjustments by following this headshot tip. That’s how I just transformed the image from a dull and underexposed snapshot to a warm and inviting headshot. Look, it is also expressing the personality.
The Tone Curve is another powerful tool for making precise tonal adjustments. You will have a solid base for further editing with these foundational adjustments in place. It allows your subjects to shine naturally and authentically.
You can see the difference here in the before image and the after image with basic adjustments applied. That’s the result you can get just after a few adjustments to Exposure and White Balance.
3. Use Brushes to Enhance Skin Texture:
When you take a photo with a high-quality camera, it can capture every tiny detail of the skin of your subject. But we don’t see skin that sharply in real life. It’s just not how our eyes work. So, you will definitely want to soften some of that texture to make your photos look more natural.
This is where brushes become the most useful things. They help you enhance skin texture in a way that looks authentic and flattering. However, it is all about finding a balance between detail and realism when it comes to using brushes. Moreover, brushes help you subtly soften skin texture.
Plus, they avoid an overly smooth or fake look. As I always say the goal is to showcase a balance. An artificial headshot is not appreciated at all. That’s where brushes preserve the individuality of your headshot while gently minimizing flaws that draw attention away from their best features.
So, let’s move to the Masking section in Lightroom or Photoshop to get started with the process. Then, grab the Brush Tool. It is usually located at the top right of your editing toolbar.
It is time to break out the brush and get to work on those problem areas. Simply paint over the spots you want to enhance. You can adjust the brush size and feather to control how intense the edit is. Just remember to steer clear of the eyes and lips.
After all, you don’t want to lose their natural detail. You can also change the brush settings and customize the edit to your liking and achieve a beautifully subtle finish. It is all about finding the right balance and making your subject look and feel amazing.
Now, have you done painting with the brush over the desired areas? If yes, you will see a red-colored mask that highlights the sections that will be impacted by your edits. The red overlay shows you exactly where the changes will be applied. Then, simply press the O key on your keyboard to toggle the red overlay on and off to get a better view of your adjustments.
Next, head to the Effects section and gently dial down the Texture slider. You can also experiment with Clarity and the Tone sliders, but be sure to keep things looking natural and authentic. The intent is to enhance the skin, not hide its unique character or facial features. That’s HOW you can simply make adjustments that complement the skin tone and create a smooth finish.
Let’s see what else I have for you to edit headshots.
4. Fix Temporary Skin Blemishes for a Confident Look:
We have all been there – stressing about a photo shoot and hoping our skin cooperates. But sometimes, a blemish or two can appear despite our best efforts. As a photographer, it is your job to make your clients feel at ease and deliver outstanding photos. You can gently remove temporary skin imperfections as it is one of the best ways to do this. It is a small customization that can make a big difference in someone’s confidence.
So, let’s take care of these minor flaws and help your clients feel more relaxed and radiant in front of the camera. I think it’s a very thoughtful touch. In addition to that, you ought to be mindful of the distinction between temporary blemishes and permanent features like moles, scars, and freckles.
These unique characteristics are a part of who your clients are, and you want to preserve their authenticity. If you are unsure about what to remove, it is always best to check in with your clients and get their input. In this way, you can make sure that you are only smoothing out temporary imperfections while keeping their distinctive features intact.
You can rely on Adobe Photoshop and Lightroom to tackle temporary skin blemishes. Warm thanks to their powerful healing and cloning tools. Moreover, you can use the following tools too in Photoshop to seamlessly remove imperfections:
Spot Healing Brush Tool:
This tool in Photoshop will quickly remove marks and blemishes with just a few clicks. It allows you to smooth out skin tones and create a flawless finish.
Healing Brush Tool:
You can paint pixels from another part of the image over problem areas using the Healing Brush tool. It blends them seamlessly to create a natural-looking result.
Clone Stamp Tool:
You can copy and paste pixels from one area to another, although it doesn’t automatically match texture and shading. Thus, this tool gives you more control over the final result.
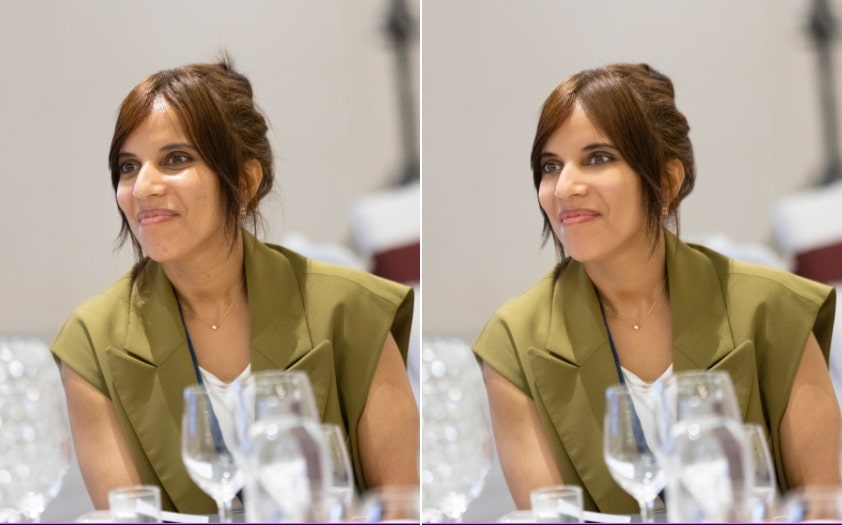
The Spot Healing Brush Tool was adjusted to a smaller size in the following given example to precisely target tiny blemishes. It was then applied to several areas to effortlessly remove imperfections and smooth out the skin.
The result given below is understated yet impactful. It strikes a perfect balance between natural and refined. Similarly, you can also subtly remove temporary imperfections and your headshots will be taken on a newfound level of sophistication. This headshot tip proves that even minor tweaks can elevate a headshot without teasing its authenticity.
See the subtle but clear difference in the above-given images before editing and after the editing stage.
5. Start Brightening the Eyes:
When it comes to headshot editing, brightening the eyes can make a complementary difference. This is because it is a subtle yet effective way to enhance the overall look. So, it is definitely a worth-trying tip for my editors. Additionally, this technique is especially useful when the subject is lit from behind or on the side.
Then, it helps to offset the shadows that often fall around the eyes. Meanwhile, using specialized brushes can help to refine the eyes and make them pop. It can also improve the overall skin texture. Overall, it’s a simple yet powerful technique that can make your professional headshots stand out from the crowd.
Let’s start to brighten up your subject’s eyes in Lightroom or Photoshop. First of all, select the Brush tool and gently paint over the eyes of the subject. From there, you can also change the settings to suit the lighting and eye color:
- Bump up the exposure to add some brightness
- Increase clarity to define the details
- Enhance sharpness to make the eyes pop
- Increasing the saturation to bring out the color
Just be careful of the contrast as adding too much can make the irises look too dark. So, immediately reduce the shadows if needed to find the perfect balance.
6. Refining the Details of Eyelashes for a Polished Look:
Eyelashes are the most attractive facial part of expression. That’s why it is important to add some extra depth to the eyes of your subject. So, how to edit headshots in terms of eyelashes? Try bringing out the detail in the eyelashes of the subject. Interestingly, this works beautifully in tandem with brightening the eyes.
Just simply brush over the lashes with a tool that has been enhanced with contrast, clarity, and sharpness. Remember, it depends on how dark the lashes are and the subject’s makeup. Also, experiment with increasing the shadows and blacks to add some extra dimension. This subtle headshot editing touch can make a big difference in the overall look of the eyes.
7. Fixing the Stray Hair:
Those pesky stray hairs can be a real nuisance in between a random photo and a professional headshot. If you notice one that has landed on the face of your subject, it is worth taking the time to remove it. Particularly, fix those stay hair if they are crossing over their eye or mouth.
Just jump into Adobe Photoshop and zoom in nice and close. Then, carefully edit out the offending hair. Look, you don’t need to obsess over every single strand. But, tackling the most distracting ones can make a big difference in the overall polish of the image.
Take the Spot Healing Brush Tool of Photoshop to seamlessly remove stray hairs. Then, carefully match the brush size to the thickness of the hair. After this, gently brush over the offending strand.
You can work in stages if needed to maintain control. You can take your time and work with precision to avoid any unwanted effects, specifically when you are brushing over delicate areas like the eye.
8. Get Rid of Any Distracting Elements:
Don’t forget to scan the background for any distracting elements in your corporate headshot or professional photos. Wall signs, bad background colors, objects, or even wrinkles in the backdrop are a few examples of distracting elements. In most cases, these things are easy to remove with a few quick edits.
But, what if you’re working on a business or professional headshot where the background is an integral part of the context? My advice would be to ask about the changes from your client before removing anything. Keep those objects as it is if they want to keep their brand signage or other relevant details intact.
Furthermore, you can rely on the same trusty tools you’d use to fix skin blemishes to tackle distracting background elements. Alternatively, if you’re using the latest version of Photoshop, you can use AI with Generative Fill. This innovative feature generates three potential solutions for you to choose from. As a result, it makes quick work of even the most stubborn background distractions.
Let’s get started with Generative Fill. First of all, grab either the Marquee or Lasso tool and carefully select the problem area. In this step, make sure to get as close to the edge as possible. Next, click on Generative Fill, leave the description field blank, and then hit the Generate button. From there, Photoshop’s AI will come into action.
Once you’ve hit the Generate button, Photoshop will present you with three different variations to choose from. You can easily click through each option to see which one works best for your image. Or, you can generate again if none of them quite hit the mark.
It’s a remarkably straightforward process. However, it is worth noting that this method may not always be effective, especially when dealing with more complex or challenging elements that need to be removed.
In some cases, you may need to remove the background entirely. This step is particularly useful for marketing purposes, such as updating a LinkedIn profile picture to match the branding of a company. Just chill about it as you can do this directly in Photoshop.
But, what if the edit is particularly complex? You can consider outsourcing it to a team of experts who specialize in advanced photo editing techniques. Zenith Clipping’s team of headshot editors is my recommendation, as always.
9. Try Using the Built-in Preset of Lightroom:
If you are looking to streamline your editing process, it is worth exploring the built-in presets of Lightroom, particularly the native color and adaptive presets. The adaptive portrait presets are especially useful.
This is because they selectively adjust specific areas of the image, such as the eyes, lips, eyebrows, beard, hair, and clothing. It is similar to how you would use a brush to make manual adjustments. Hence, this is a great way to achieve a polished look with the least effort.
One of the benefits of using Lightroom’s presets is that you have complete control over their intensity. Plus, you can adjust the opacity of any preset to fine-tune the effect. In fact, you can apply them at any stage of your editing process – either as a starting point or as a final touch. It all depends on your workflow and preferences.
Moreover, it’s often necessary to dial back the intensity to achieve a natural look when you are using presets for color grading. For example, try applying a preset like VCR06 from the Video: Creative section. You will find that reducing the amount to around 40% helps to strike a balance between creative flair and realism.
More importantly, don’t leave your results as it is. You are free to adjust the tone curve and color grading after applying presets. In fact, you can do many more things. So, it will help you match your signature style.
10. Whitening or Just Lightening Teeth:
Whitening or lightening teeth is another useful tip that can enhance a headshot if you apply it correctly. There is no doubt it makes the smile look healthy and bright. Similarly, eye whitening also makes the eyes appear brighter.
Most photo editors, including myself, use brushes and adjustment layers to do this. However, remember that white teeth can look great for young people but it’s better to just lighten them for older people. In this case, the photo editor needs to use good judgment.
Headshot Photography Editing Tips FAQ
1. Is it OK to edit headshots?
Yes, editing headshots is okay. It is expected and helps improve image quality. You can make subtle changes, like fixing exposure or removing blemishes, to create a professional look. However, try to avoid overediting to keep the headshot real, not robotic.
2. How do I make my headshots look professional?
To make your headshot look professional, apply subtle edits. For example, fix exposure and color balance, soften skin texture, and brighten eyes. Also, remove distracting elements like hair or blemishes. And always consider the headshot’s purpose. For example, corporate headshots need a polished look. Contrarily, creative ones can show more personality.
3. Can I apply face reshaping and body contouring on my headshots?
Yes, you can do face reshaping, and body contouring helps to adjust the proportion and shape of the face and body of your subject. This can include changing the nose, chin, or jawline shape, or adding/removing weight or muscle tone.
4. Can I add makeup and digital cosmetics to a headshot?
Yes, you can add makeup and digital cosmetics to enhance the subject’s appearance. This can include adding eyelashes, lipstick, or adjusting skin tone. However, it is best suited for high-end fashion shoots, as keeping it authentic is usually the best approach.
Final Word
So…me, Towab Muhammad Yusuf and my beloved readers have come to the end of this guide about how to edit a photo for a headshot. We found that you don’t need long hours to edit headshots. I understand that expert retouchers and photography editors take hurs and even days to edit each and every headshot professionally. But, you don’t need to discourage yourself from editing your headshots all on your own.
You can apply the above-mentioned headshot tips to get improved results. Your lightly finished headshots will impress your boss or clients. Remember, perfection is not the goal. Enhancing the best features of the subject, along with taking care of the natural appearance, is the priority. With the passage of time and practice, you’ll start producing intuitive headshots that will generate more leads.