Hey there, young artists! Adobe Photoshop is a powerful tool for editing photos and creating designs, but sometimes even simple tasks like underlining text can seem tricky. Have you ever wanted to make your words stand out in a cool way?
Well, get ready because we’re going to learn how to underline text in Photoshop!
It’s like adding a superpower to your words, making them bold and eye-catching.
Quick Answer: To underline text in Photoshop, select the Type Tool, type your text, then highlight it. Next, in the Character Panel, click the Underline option (T with an underline). If you don’t see the Character Panel, go to Window > Character to make it visible.
We will learn step by step in the sections below.
Table of Contents
Explanation of What Underlining Text Means
When you write something down, like a story or a message, you might want to make certain words or sentences stand out.
That’s where underlining comes in! Underlining is like giving a word a special highlight by drawing a straight line underneath it.
Imagine you’re reading a book, and you see a word with a line underneath it.
That line is there to say, “Hey, look at me! I’m important!” It’s like putting a spotlight on that word to make sure everyone notices it.
So, when we talk about underlining text in Photoshop, we’re adding these special lines to our words to make them pop and grab people’s attention.
It’s a fun way to make your writing stand out and look extra cool!
Step-by-Step Guide to Underlining Text in Photoshop
Step 1
To underline text in Photoshop, first, you need to install Photoshop on your laptop or computer.
Then, open it and click on the right side of the file menu. Here you will get the icon “New” from the Photoshop window menu.
Click on that icon, and you will get space or an empty document for new text to write. This step is very easy to handle.
Step 2
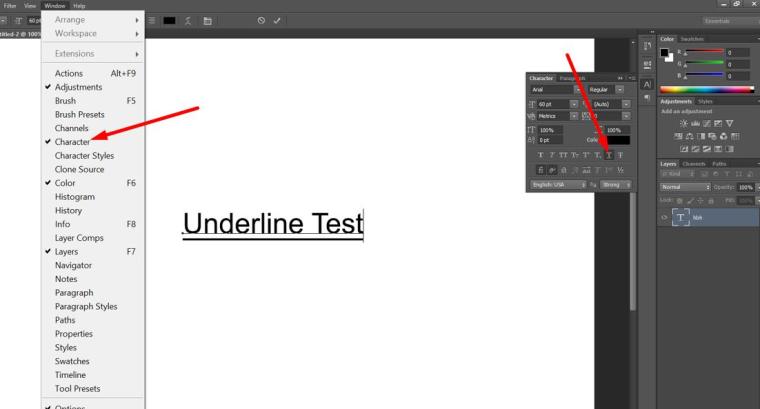
Now, move on to the character panel. Step 2 is present in the Window tool on the upper side of the document in Photoshop.
Click on the right-side window tool. A drop-down list will appear in which you can easily see “Character”.
Click on Character to make sure that it is visible. Click on the underline button in the character window menu.
If it is already visible, leave it without clicking, because that is what is required to edit the file.
Step 3
In this step, search for “Type” which is represented by the icon of capital T and it is under the tool panel.
Now click on “T” and click the underline button on the image or document. It will give you space to create a Type toolbar.
Step 4
Now search for the underline button that is present in the row of buttons on the left top of the document below the tools.
It is shown as “T” with an underline button. Click on that icon.
Step 5
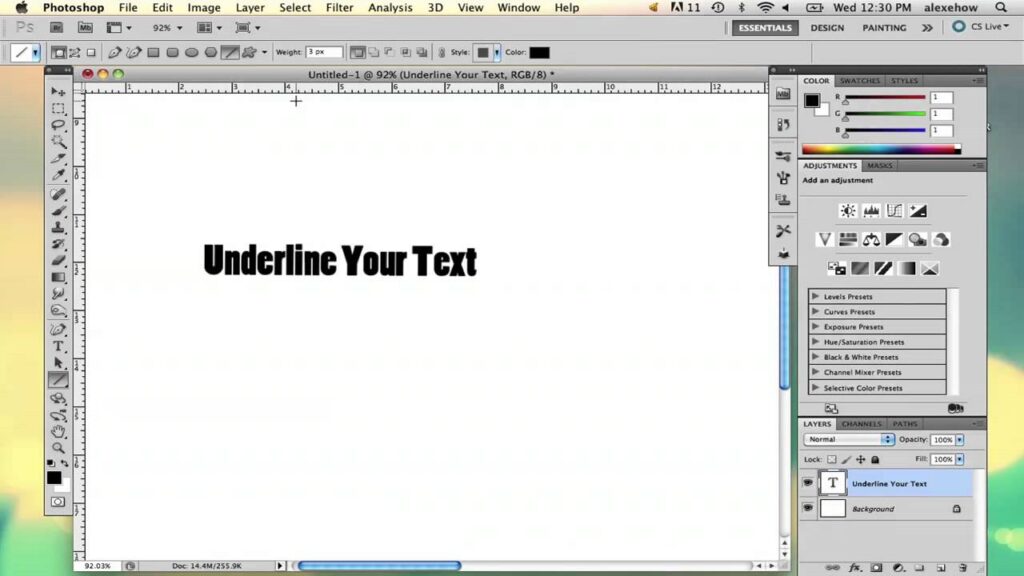
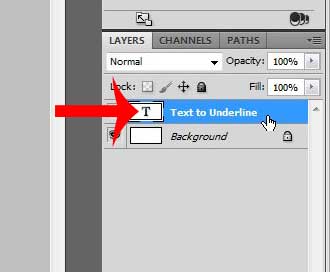
Now you have added the text to your image or document. The next step is to create layers with the underline button on the text layer to make it separate from the image.
To add a text layer, go to the Layers panel and select Layers.
If you do not have access to the layers panel, just click F7 on the keyboard you are using. Text layers will be added automatically.
Now you have created an underlined text in your document through Photoshop. These steps are very simple.
Now we will be looking at an existing text to underline text in Photoshop.
This process is also done by different steps that are similar to those with new text.
How to underline existing text in Photoshop at MAC
If you’re working on a Mac and want to underline text that is already in your Photoshop document, follow these steps:
- Select the Text Layer: Open your Photoshop document and find the text layer you want to underline in the Layers Panel (usually on the right-hand side).
- Choose the Type Tool: Press T on your keyboard or select the Type Tool from the toolbar.
- Highlight the Text: Click on the text you want to underline, and drag your mouse to select it.
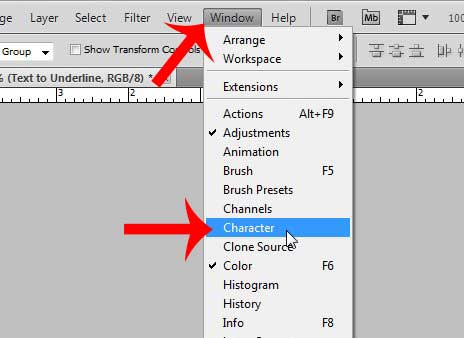
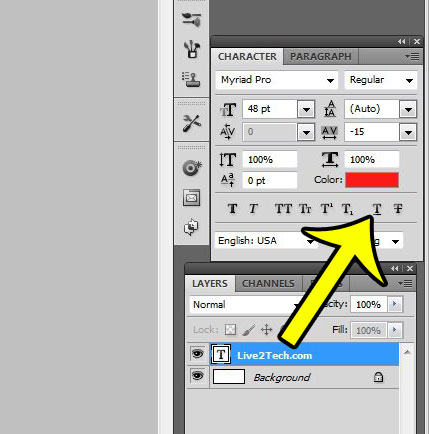
- Open the Character Panel: Go to the top menu and click on Window > Character to open the Character Panel.
- Click the Underline Button: Once the Character Panel is open, simply click the Underline button (a “T” with a line underneath it) to add an underline to your selected text.
- Adjust If Needed: If you want to change the underline’s appearance, adjust the font size or style from the options in the Character Panel.
That’s it! Your existing text is now underlined.
Tips for Effective Underlining
Sure! Here are some friendly tips for effectively underlining text in Photoshop:
Choose the Right Font and Size
Make sure to pick a font and size that are easy to read and look good with the underline.
Some fonts might look too fancy or too small when underlined, so experiment until you find the perfect match!
Keep it Simple
Sometimes, less is more! Try not to underline too much text or use too many different styles of underlining in one design.
Keep it simple, and let the underlined words stand out on their own.
Use Contrasting Colors
If you’re adding color to your underlined text, make sure it contrasts well with the background color.
This will make the underline easier to see and help your words pop!
Pay Attention to Thickness
The thickness of the underline can make a big difference in how it looks.
Experiment with different thickness settings until you find one that looks just right for your design.
Make it Consistent
If you’re underlining multiple words or sentences in the same design, try to keep the underlines consistent in style, thickness, and color.
This will help create a cohesive look and make your design more polished.
Don’t Overdo It
Underlining can be a great way to add emphasis to important words or phrases but try not to overdo it.
Too much underlining can make your design look cluttered and hard to read. Instead, use it sparingly to draw attention to key points.
Conclusion
Now that you know how to underline text in Photoshop, you’re all set to make your words stand out and shine bright!
Adding underlines is like giving your words a big hug, making them feel extra special.
Remember to play around with different fonts, colors, and sizes to find the perfect look for your project.
Don’t be afraid to get creative—there are no wrong answers when it comes to making art!
So, keep practicing and exploring all the amazing things you can do with Photoshop.
With a little imagination and a lot of heart, you can create anything you dream of.
For professional photo editing services that go beyond text adjustments, Cut Out Image Media is here to help! We specialize in enhancing your photos, ensuring they meet your exact needs.
FAQs
1. Can I underline part of the text in Photoshop?
Yes, you can underline just part of the text. Highlight the specific text you want to underline, and then click the underline button in the Character Panel.
2. What if I don’t see the Character Panel in Photoshop?
If the Character Panel isn’t visible, you can enable it by going to the Window menu and selecting Character from the dropdown.
3. Can I change the style or thickness of the underline?
The default underline thickness is based on the font size, but if you need a custom underline style, you can use the Line Tool to manually draw an underline and adjust its thickness and color.
4. Does Photoshop automatically allow for underlining in all fonts?
Most fonts in Photoshop allow underlining. However, there might be some specialty fonts where underlining doesn’t apply. In such cases, you can always use the Line Tool for a manual underline.
5. Can I change the color of the underline without changing the text color?
Yes! To do this, you can create a custom underline using the Line Tool, and then change the color of the line without affecting the text color.

