You know, have you ever just looked at one of your action figures and pictured this entire epic world for it? Well, today we’re going to show you exactly how to capture that big imagination in one single powerful photo. We’re talking about taking action figure photography and turning those simple plastic figures into legit heroes, villains, and adventurers. Essentially, we are transforming these simple plastic figures into characters with compelling stories to share.
So, if that quote feels a little too real, don’t even worry about it. Seriously, we have all been there. But here’s the good news. Achieving that wow factor and adding that extra pop to your toy photography is considerably simpler than you might believe. It really just comes down to knowing a few key toy photography tips.
Alright, so here’s the game plan. We’re going to cover some toy photography ideas, making small worlds big, your toolkit, and the best technique for toy model photography. We’ll dive into the manual settings for toy photography, mastering light and shadow, and finally create some movie magic, even looking at the style of experts like Carlos Garcia Toy Photography. We’re literally going from the absolute basics all the way to the best settings for toy photography and cool, movie-style special effects.
Are you ready? Let’s jump in.
Table of Contents
What is Toy Photography?
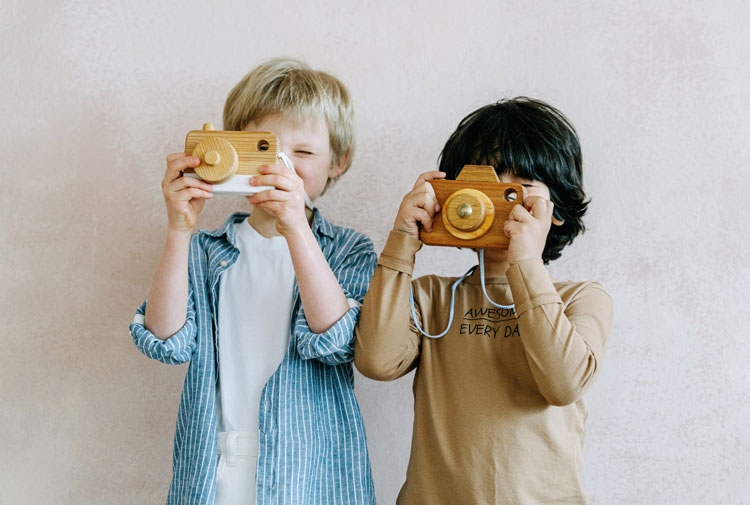
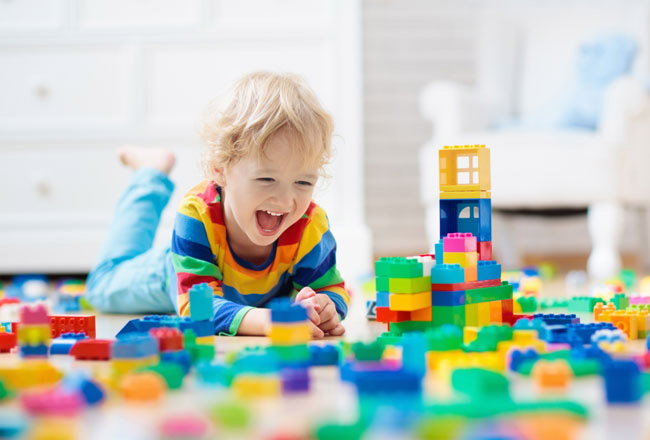
Toy photography captures small plastic figures. Many beginners start toy photography for beginners at home. You can try toy photography for kids with simple dolls. Fans love action figure photography for heroic scenes. Miniature photography makes small worlds look real. Artists use LEGO photography to build city life. Figure photography focuses on character details. Some people create diorama photography with tiny props.
Why Do You Need Creativity in Toy Product Photography?
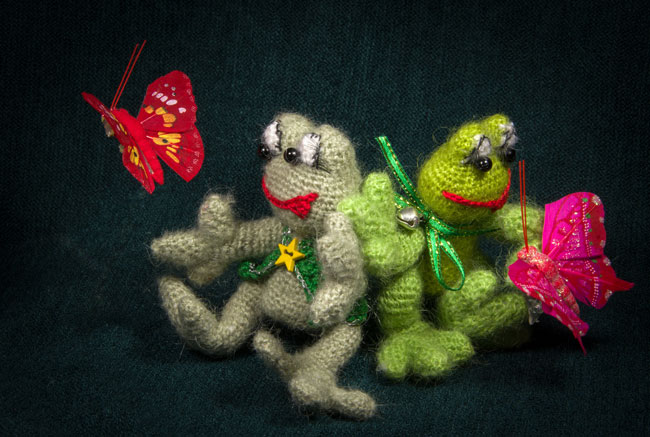
Toy creativity changes plastic into living art. Photographers make creative toy shots with light. A creative miniature scene tells a deep story. People build creative dioramas from everyday items. Toy storytelling adds emotion to every image. Use storytelling toys to show cinematic drama. Your toy adventures can feature brave heroes. Many artists share toy humor photos for laughs. Fun toy photos engage the audience quickly. Creative toy photography removes the fake look.
Unique Style Among Competitors
A unique style helps brands stand out. Custom toy photography offers original visuals. You can design custom figures for specific ads. A custom diorama creates a special world. Aesthetic toys catch the viewer’s eye. This method beats boring stock photos. High-quality art builds brand trust. Unique images boost sales by 30 percent.
An Exciting and Thrilling Experience
Your toy adventures bring back childhood joy. Cinematic toy photos look like movie scenes. Use action pose toys to show movement. This exciting experience feels like adult play. Figuring out poses provides a mental thrill. Creating worlds offers a peaceful escape. Tiny details require great focus.
Storytelling at Its Best
First up, making small worlds big. So what’s the reason behind the shot? Okay, this is a really big mental shift you have to make. The key is to stop thinking about taking a picture of a toy. Instead, you’ve got to start thinking about toy storytelling. See the difference? You’re not just a photographer here; you’re a world builder engaged in scene building.
I mean, think about it. This is a super unique kind of realistic miniature photography because you are the director. You control every single thing. The characters, the lighting, and the toy scene creation—it’s all in your hands. You aren’t just snapping a plastic figure; you are crafting lifelike toy shots within a vast miniature world.
Broadens Viewers’ Thought
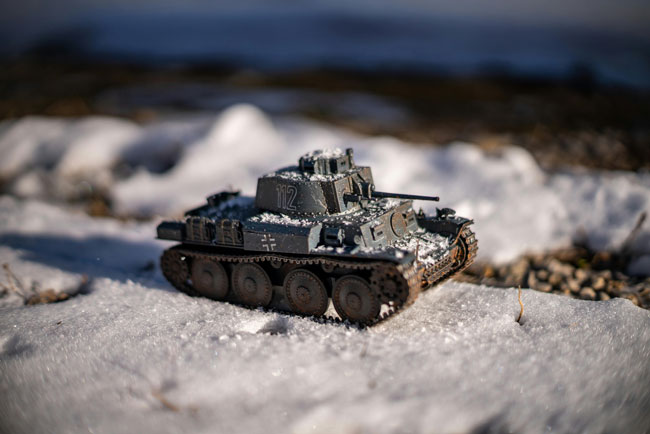
Photographers create a miniature world. They place the toy in real-world settings. Forced-perspective toys look life-sized. Artists use everyday object integration. These images challenge the mind. A plastic figure feels alive. Viewers imagine new stories. Scale tricks the eye.
10 Creative Toy Photography Ideas for Taking Realistic Images
Try these toy photography ideas. Build miniature landscapes with moss. Use forced perspective to create an optical illusion. Low-angle shots make toys look heroic. Use an eye-level perspective for realism. Dramatic lighting toys add mystery. These are cool ideas for toy photography with a phone. Tiny props create big drama.
1. Choosing the Right Toys for Photography
Artists select the best toys for photography. Flexible action figures allow dynamic poses. Many use LEGO minifigures for city scenes. Hot Wheels photography captures fast motion. Collectors love Funko Pop figures for portraits.
Good miniature toys for photography have great detail. You need 1/12 scale accessories for toy photography. Some use 1/6 scale props for toy photography. These small toys for photography work well.
2. Coming Up with Ideas for Toy Photography
Search for fresh toy photography ideas. Recreate scenes from movies. Use “what if” scenarios for humor. Develop unique diorama ideas. Outdoor walks provide spontaneous inspiration. Seasonal themes offer relatability. Holiday props add charm. These toy photo ideas keep work exciting.
3. Find Toy Photography Locations
Outdoor toy photography uses natural textures. Parks offer great rocks. Backyard dirt looks like mountains. An outdoor diorama utilizes real sunlight. Use an indoor toy setup for total control. Windowsills provide soft light. Tabletops serve as steady bases. Puddles look like huge lakes.
4. Building a Custom Stage Set
Toy staging requires foam boards. You build a custom diorama for specific themes. A miniature stage needs a solid diorama base. Foam insulation makes realistic rocks. A studio setup uses artificial lights. Scene building involves tiny details. Use 1/12 scale props for toy photography. These miniature props maintain the illusion.
5. Prepared the Core Equipment to Help Shoot
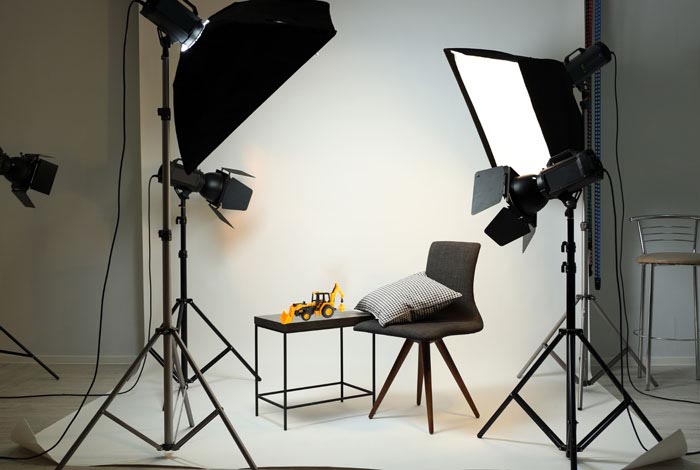
You gather stuff you will need for toy photography starter kits. Every photography kit requires specific tools. High-quality gear improves your final images. Proper essential equipment makes toys look real. You need a complete setup for success.
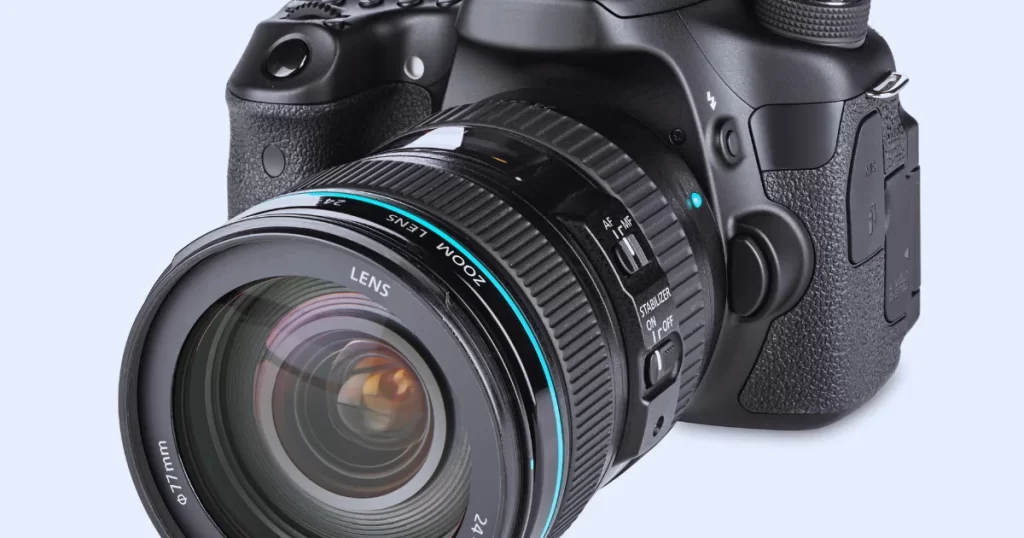
- Camera
Choosing a camera for toy photography is important. A mirrorless model is the best camera for toy photography. Some professionals use the best DSLR camera for toy photography. Beginners look for the best value camera for toy photography. You can use the best phone for toy photography instead. Most cameras for toy photography need manual controls.
A digital camera offers manual controls. Photographers buy professional camera gear. Many beginners use a camera phone. Remote shutters prevent camera shake.
- Lens
The lens for toy photography determines the detail. A macro lens captures tiny textures. Many experts choose the best lens for toy photography. You need a macro lens for toy photography for close-ups. This is the best macro lens for toy photography.
Some buy the best Canon lens for toy photography. Others prefer the best Nikon lens for toy photography. You might want the best Sony lens for toy photography. This specific type of lens for toy photography creates a life-sized look.
- Tripod
A tripod for toys prevents blurry images. Every tripod must reach low angles. Stability remains vital for macro work. Sharp photos require a steady base.
- Lighting
Good lighting for toy photography builds the mood. Portable LED lights work perfectly. Small Lume Cube units fit tiny spaces. These are the best lights for toy photography. You can use lights for toy photography to create shadows. Many search for a light for toy photography that mimics the sun.
A lighting kit helps control the scene. A professional lighting kit for toy photography includes reflectors. You can find good lamps for toy photography at home. Dramatic lighting toys look cinematic. Use product photography lights for clean shots.
Macro lenses capture tiny details. Some use studio lights. Full-scale studio lights provide power. A proper lighting setup builds mood. Use off camera flash for shadows. Different angles of light create depth. Master various lighting techniques. Many prefer natural light. Home photography works near windows. You can use light filtering through a tree canopy.
- Backdrop
The background for toy photography sets the location. You can find many backgrounds for toy photography outdoors. Professional backdrops for toy photography include printed vinyl. Various backgrounds you can use for toy photography exist in your house. Backdrop paper creates a smooth look. A white background works for clean product styles.
- Essential Equipment
Well, the great news is you probably have everything you need right now. Seriously, look at this list. The camera in your pocket, your smartphone, is a fantastic place to start. A remote shutter is going to be a total game-changer for getting those super sharp, non-blurry shots; even a cheap one works wonders. And a light source, like a desk lamp, is all you need to start creating some dramatic moods, especially if you add a light diffuser for toy photography. The real magic happens when you realize you can combine all these simple, everyday things.
You can experiment with light modifiers like a DIY light diffuser for toy photography made from tissue paper or use a simple reflector board to bounce light back onto the figure. If you want that professional look, you might eventually look into softbox photography or a diffusion panel, but for now, even a lens hood or an external flash can be improvised. If you want to get really close to the detail, you can even use extension tubes.
And this quote from a fellow photographer on Reddit just nails it: “You know, I did photos with my phone camera for a long time.” That says everything. You do not need a crazy expensive professional camera to make amazing images. It’s a cliché, but it’s true. The best camera is the one you actually have with you.
6. Adjust Proper Distancing to the Camera

The photographer must adjust proper distancing. This step ensures the correct scale. You use close-up photography for tiny details. Sharp macro toy shots reveal hidden textures. Moving the camera changes the background size. Proper spacing isolates the subject.
7. Elevating Your Figures or Diorama Up Into the Frame
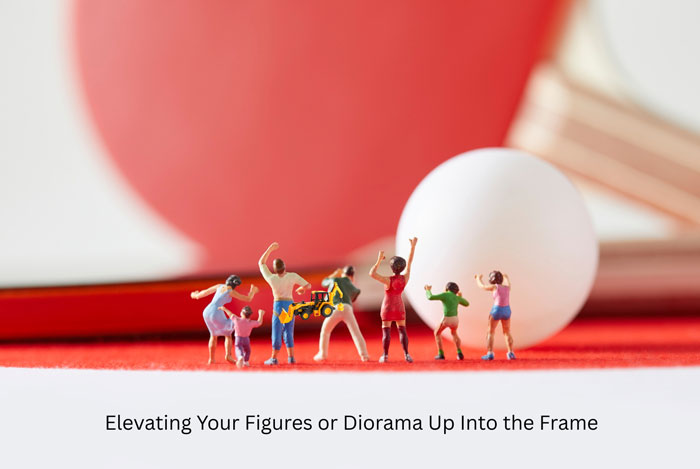
You should try elevating figures. This technique allows low camera angles. Low angles create heroic action figure poses. Your toy posing looks more natural at eye level. Elevation helps match the horizon line. The miniature world blends with the real world.
8. Using an F-stop Increases the Depth of the Field

F-stop settings control the depth of field. High numbers keep the whole scene sharp. A wide aperture creates a different look. This produces a bokeh background. Photographers use bokeh toys for soft portraits. Proper depth of field toys look professional. You choose the focus based on your story.
9. Forced Perspective to Create an Optical Illusion
Artists use forced perspective to trick the eye. Forced-perspective toys look like giant statues. This method creates a toy forced scale. You place the figure near the lens. Distant real objects look small. This scale difference creates a believable reality. Wide-angle lenses improve the effect.
Macro mode helps with close-up focus. Artists shoot at the macro level. Forced-perspective photography tricks the eye. This camera technique makes toys look huge. Software fixes exposure issues. A background remover changes the scene. Editors merge several layers. Sharpening improves final image quality. Digital backgrounds add cinematic worlds. A light box provides clean white space. Indoor dioramas use foam board. Nature offers realistic textures.
10. Creating Powerful Artistic Compositions
All right, section three is about creating powerful compositions, going from posed to powerful. So you’ve got your gear. Now, how do you arrange everything to create a shot that really has some punch? Well, that’s where composition comes into play. It’s all about how you arrange the stuff in your frame to guide the viewer’s eye and, you know, tell a story.
So let’s look at the difference here between standard toy portrait photography and being caught in action. A basic portrait toy figure shot feels like a school picture, right? It’s static. But an action shot feels like a frame from a movie.
And the easiest way to do this? Use low-angle shots. Get your camera down low and aim for an eye-level perspective. Those low angles automatically make your subject look heroic, bigger than life. It just instantly feels more dynamic than a typical shot from above.
Exclusive Techniques for Different Toy Product Photography
Successful toy product photography requires special methods. You create miniature art with custom lighting. Toy macro art highlights plastic details. Photographers seek plastic toy realism. You make lifelike toy shots with soft shadows.
Some use toy light painting for glow. Smoke effects add mysterious atmospheres. Practical effects toys look more cinematic. Artists add explosion effects for action scenes. Post-processing toys remove stand wires. Photoshop composites combine many layers.
Frequently Asked Questions on Toy Photography
What is Toy Photography?
This genre captures miniature figures. Artists tell stories through toys. These photos make plastic look alive. Each image expresses dynamic action. Inanimate objects become characters.
Why Do You Need Creativity in Toy Product Photography?
Creativity humanizes static objects. Unique shots increase conversion rates. Bold compositions attract modern customers. New worlds spark deep nostalgia. Artists remove the plastic feel.
What is forced-perspective toy photography?
This technique uses optical illusions. Small toys appear life-sized. Photographers place figures near the lenses. Real backgrounds stay far away. Narrow apertures sell the scale.
What is the best focal length for toy photography?
Macro lenses capture intricate details. The 85mm prime creates portraits. Wide-angle lenses show vast environments. Zoom lenses offer total versatility. Different styles require specific focal lengths.
Final Word
So you’ve got the techniques now. You’ve seen what’s possible. The only real question left is, what stories are your toys going to tell? Seriously, what are you waiting for? Grab a favorite figure, find some cool light, and just start shooting. We can’t wait to see what kind of world you bring to life.
If you face any problem while editing your captured toy photos, feel free to seek help of Cutout Image Media!